Easy Sepia Toning With The Camera Raw Filter In Photoshop CC
Written by Steve Patterson. In this tutorial, we’ll learn how to easily add a classic sepia tone to an image using the Camera Raw filter in Photoshop CC (Creative Cloud). You can also create this exact same effect in Photoshop CS6 and earlier by opening your image in Adobe Camera Raw, but the nice thing with Photoshop CC is that Camera Raw can now be applied as a filter directly from within Photoshop itself! And as we’ll see, by combining the Camera Raw filter with Smart Objects, we can add our sepia tone in a way that’s completely non-destructive.
Download our tutorials as print-ready PDFs! Learning Photoshop has never been easier!
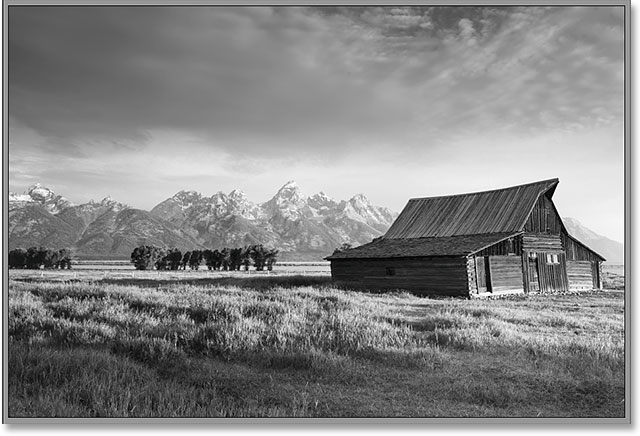
Here’s the image I’ll be using (barn at dawn photo from Shutterstock)
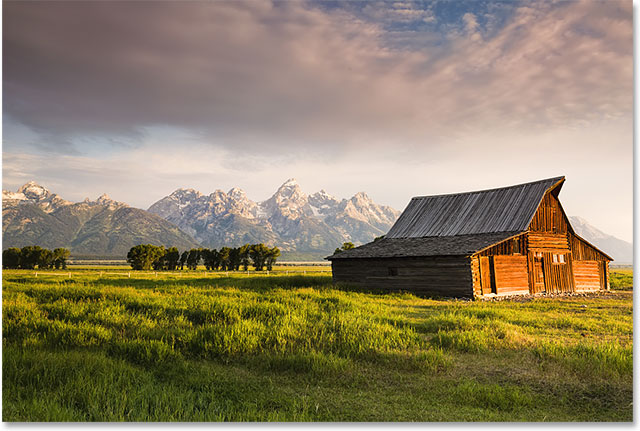
The original photo.
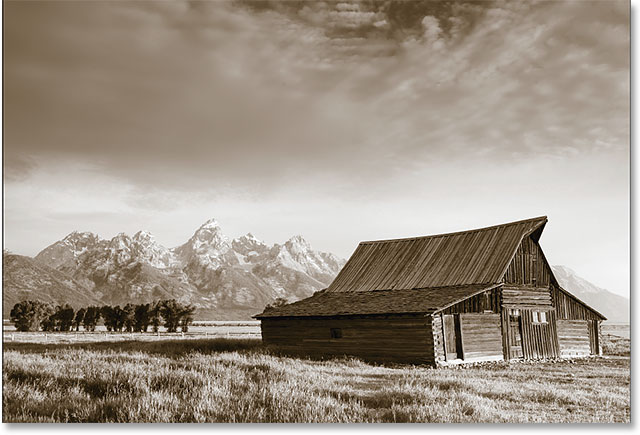
And here’s what the final result will look like after adding the sepia effect:
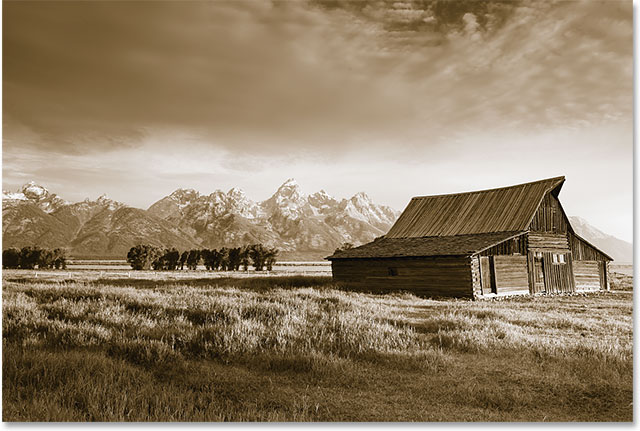
The final result.
Let’s get started!
Step 1: Convert The Layer Into A Smart Object
With my image newly opened in Photoshop CC, if we look in my Layers panel, we see the photo sitting on theBackground layer, currently the only layer in the document:
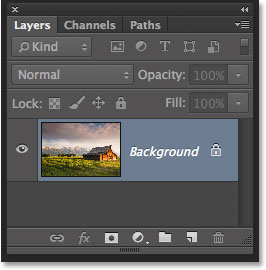
The Layers panel showing the image on the Background layer.
Before we apply the Camera Raw filter to the image, let’s first convert this layer into a Smart Object. That way, the Camera Raw filter will be added as a Smart Filter, allowing us to apply the sepia tone to the image non-destructively. To do that, click on the small menu icon in the top right corner of the Layers panel:
![]()
Clicking the menu icon.
Then choose Convert to Smart Object from the menu that appears:
Choosing "Convert to Smart Object" from the Layers panel menu.
Nothing will seem to have happened to the image, but if we look again in the Layers panel, we see a small Smart Object icon in the lower right corner of the layer’s preview thumbnail. This lets us know the layer has successfully been converted into a Smart Object:
![]()
The layer preview thumbnail showing the new Smart Object icon.
Step 2: Apply The Camera Raw Filter
We’re now ready to apply the Camera Raw filter to the image. Go up to the Filter menu in the Menu Bar along the top of the screen and choose Camera Raw Filter:
Going to Filter > Camera Raw Filter.
This opens the Camera Raw filter’s dialog box. For the most part, the Camera Raw filter in Photoshop CC gives us the same tools, panels and controls we’d find if we had opened the image in the main Adobe Camera Raw plug-in, with the toolbar displayed in the upper left of the dialog box and the various panels over on the right. The image itself appears in the large preview area:

The Camera Raw filter’s dialog box in Photoshop CC.
Step 3: Switch To The HSL / Grayscale Panel
As I mentioned, the panels are located directly below the histogram in the column that runs down the right side of the dialog box. The Basic panel is the one that opens by default, but we can switch to any of the other panels by clicking on the tabs that run along the top of the panel area. Click on the fourth tab from the left to switch from the Basic panel to the HSL / Grayscale panel:
Clicking the HSL / Grayscale tab to open its panel.
Step 4: Select the Convert to Grayscale Option
One of the things we can do in the HSL / Grayscale panel is convert our full color image to black and white. Let’s do that before applying the sepia tone. Select the Convert to Grayscale option at the top of the panel by clicking inside its checkbox:
Selecting "Convert to Grayscale".
As soon as you select this option, your image will be converted to black and white in the preview area, using Camera Raw’s auto settings:
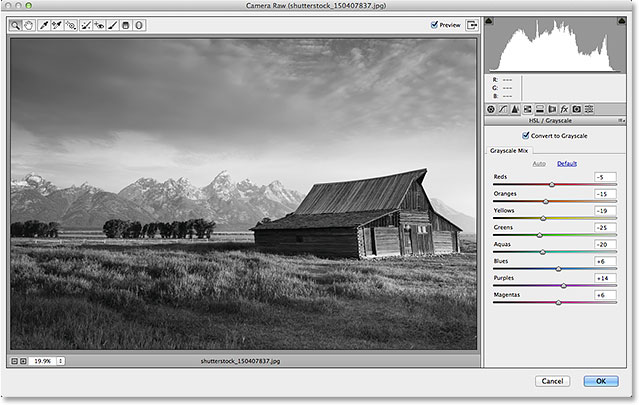
The initial black and white conversion.
Step 5: Create A Custom Black And White Version
To fine-tune the effect and create your own custom black and white conversion, simply drag the individual color sliders (Reds, Oranges, Yellows, Greens, etc.) in the Grayscale Mix section of the panel. Dragging a slider to the right will lighten any areas of the image that originally contained that color, while dragging the same slider to the left will darken those areas. For example, my image contained quite a bit of yellow, especially in the grass, so as I drag the Yellows slider towards the right:
Dragging the Yellows slider to the right.
The grass becomes lighter in the black and white version. You can experiment with the various color sliders as much as you like until you’re happy with the results:
Any areas originally containing yellow are now lighter after dragging the Yellows slider.
Step 6: Switch To The Split Toning Panel
Now that we’ve converted the image to black and white, we can apply our sepia tone. For that, click on the tab directly to the right of the HSL / Grayscale tab to open the Split Toning panel:
Opening the Split Toning panel by clicking on its tab.
Step 7: Set The Hue And Saturation Values For The Shadows
The controls for the Split Toning panel are divided into three sections – a Hue and Saturation slider for theHighlights at the top, a separate Hue and Saturation slider for the Shadows at the bottom, and a Balance slider in between the Highlights and Shadows sections. To create our sepia tone, we can ignore the Highlights section, leaving both the Hue and Saturation sliders set to 0. This will leave the brighter tones of the image as grayscale areas. All we need to do is apply a color to the darker areas (the shadows), and for that, we use the Shadows sliders.
First, we choose a color for the shadows using the Hue slider. For a sepia tone, a Hue value of between 40 and 50 usually works well. I’ll split the difference and set my Hue value to 45, which gives me an orange-ish yellow. You won’t actually see the color being applied to the image, though, until you increase the Saturation slider. Set the Saturation value to around 40:
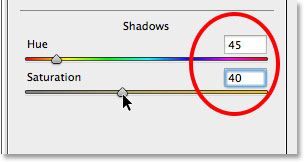
Setting the Hue to 45 and the Saturation to 40 in the Shadows section.
Here’s what my image now looks like in the preview area:
The initial sepia tone effect.
Step 8: Adjust The Balance Slider If Needed
Finally, even though we ignored the Hue and Saturation sliders in the Highlights section at the top of the panel, we can use the Balance slider to push our sepia tone further up into the brighter areas of the image. By default, the Balance slider sits halfway between the shadows and highlights, but as we drag the slider towards the left, moving it into the darker areas, we shift the balance of the image in favor of the shadow color. In other words, the shadow color will begin to reach more and more into the brighter tones as well. If we dragged the Balance slider all the way to the left, we’d effectively tint the entire image with the shadow color, but we don’t need to go quite that far. I’ll drag my Balance slider roughly halfway towards the left, giving me a value of around -50:
Dragging the Balance slider towards the left.
And now, the sepia effect has been applied not only to the darkest tones but also to lighter areas as well. Only the very brightest areas in the image remain in grayscale:
The effect after dragging the Balance slider towards the left.
When you’re happy with the look of your image, click the OK button in the lower right corner of the dialog box to accept your settings and close out of the Camera Raw filter:
Clicking the OK button.
If you recall from back in Step 1, before we applied the Camera Raw filter to the image, we first converted the Background layer into a Smart Object. This allowed the Camera Raw filter to be added as a Smart Filter, and if we look once again in the Layers panel, we can see the Camera Raw filter listed as a Smart Filter below the image. This means that our sepia tone effect is actually completely separate from the image itself. We can toggle the effect on and off simply by clicking the small visibility icon (the "eyeball" icon) to the left of the filter’s name. Click the icon once to turn the effect off and revert to the original image. Click it again to turn the sepia effect back on. You can also double-click directly on the name "Camera Raw Filter" to re-open the filter’s dialog box if needed and edit your settings:
Click the "eyeball" icon to toggle the sepia effect on and off. Double-click the name of the filter to re-open it.
And there we have it! That’s how to easily apply a classic sepia tone to an image non-destructively using the Camera Raw filter in Photoshop CC (Creative Cloud)!
You must Sign up as a member of Effecthub to view the content.

A PHP Error was encountered
Severity: Notice
Message: Undefined index: HTTP_ACCEPT_LANGUAGE
Filename: helpers/time_helper.php
Line Number: 22
3296 views 0 comments
You must Sign up as a member of Effecthub to join the conversation.