Striped Fuzzy Text Effect
http://textuts.com/striped-fuzzy-text-effect/
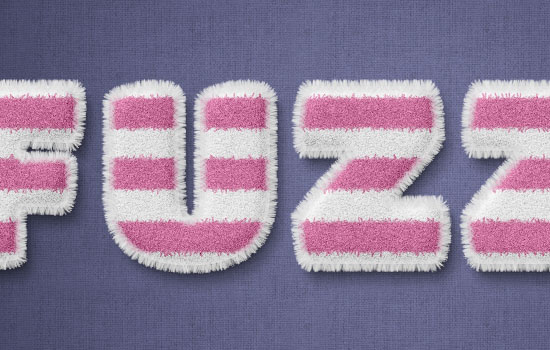
If you’re a fan of the fuzzy/fluffy stuff, you’ll like this text effect. It is a really simple one, created using Photoshop’s Layer Styles, brushes, and Filters. You can use any color you like for the stripes, and even create them in different sizes. The techniques are pretty easy, but they give a nice, almost realistic, result.
The Final Result:

Notes:
* the software used in this tutorial is Adobe Photoshop CS6, but you can use CS3+ versions as well.
* you might want to check the Basix Page to see some useful topics on dealing with Photoshop basics, such as loading palettes and some shortcuts.
Resources:
* Titan One font.
* Potato Sack by klikekyle.
* White Texture pattern by Dmitry.
Note: You might need to load the Contours used in the tutorial, so check this image to see how to do so.
Step 1
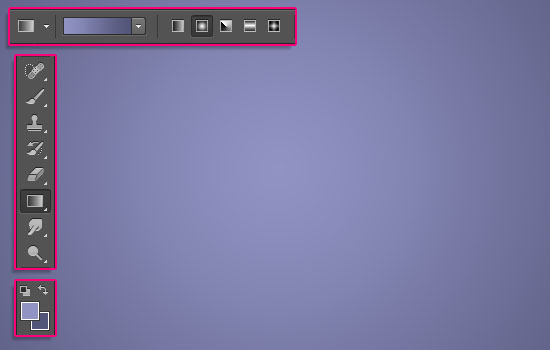
Create a new 1000 x 460 px document. Set the Foreground color to #9193c3 and the Background color to #525578. Pick the Gradient Tool, choose the Foreground to Background gradient fill, and click the Radial Gradient icon.
Then, click and drag from the center of the document to one of the corners to create the background gradient.
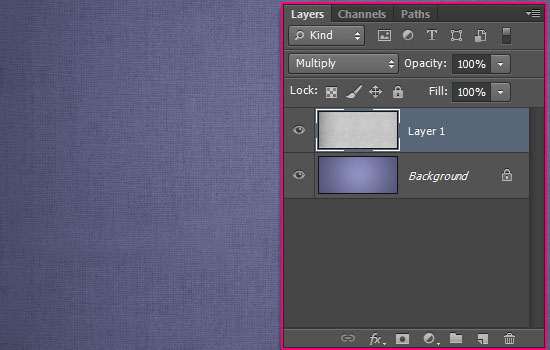
Place the “Potato Sack” texture on top of the Background layer, and change its layer’s Blend Mode to Multiply. Then, resize it as move it until you like how it looks.
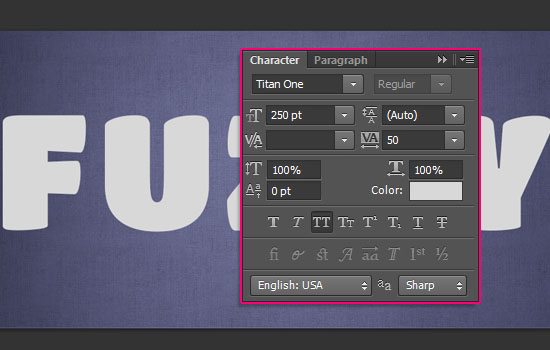
Create the text in All Caps using the font “Titan One”. The color is #d8d8d8, the Size is 250 pt, and the Tracking value is 50.
Step 2
Double click the text layer to apply the following Layer Style:
– Bevel and Emboss
Size : 27
Check the Anti-aliased box
Shadow Mode – Color : #d8d8d8

– Contour
Contour : Half Round
Check the Anti-aliased box.
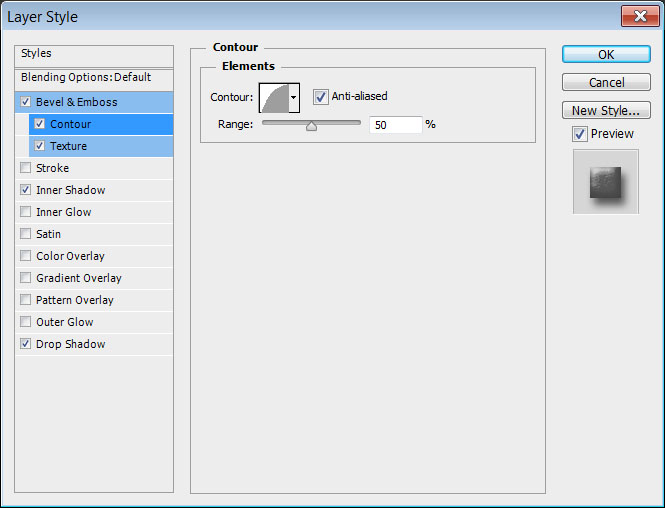
– Texture
Pattern : White Texture
Depth : 50%

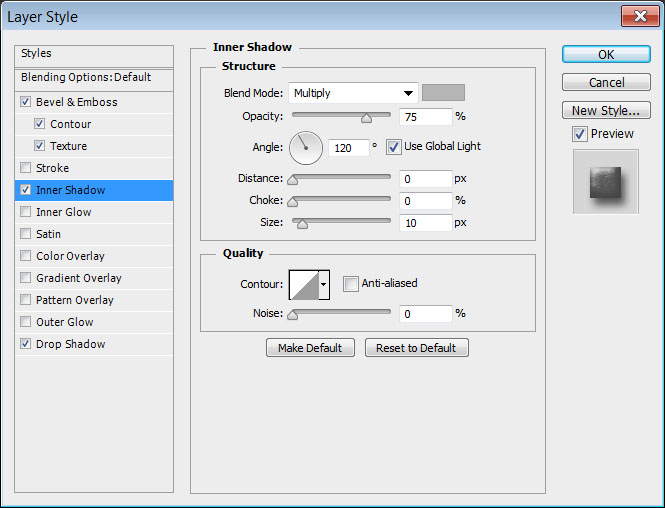
– Inner Shadow
Color : #b5b5b5
Distance : 0
Size : 10
– Drop Shadow
Opacity : 60%
Distance : 8
Size : 9
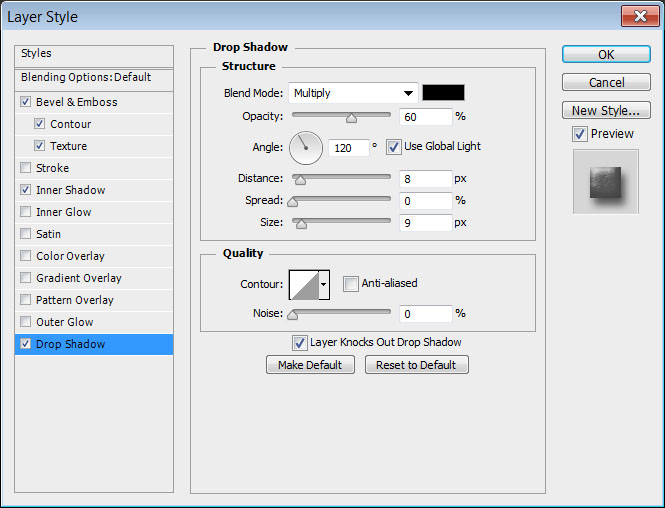
This will create the main text material, and give it a 3D look.

Step 3
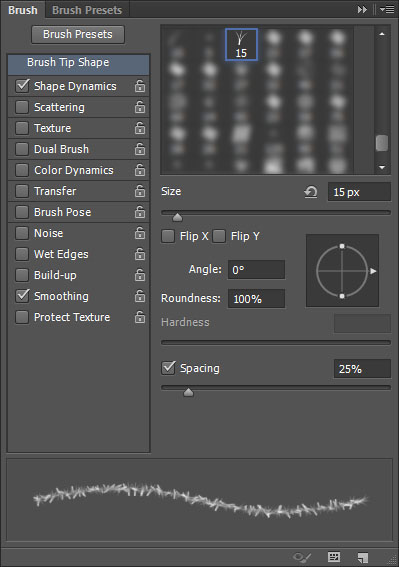
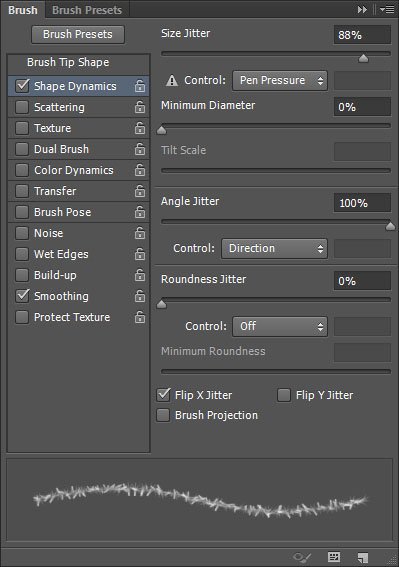
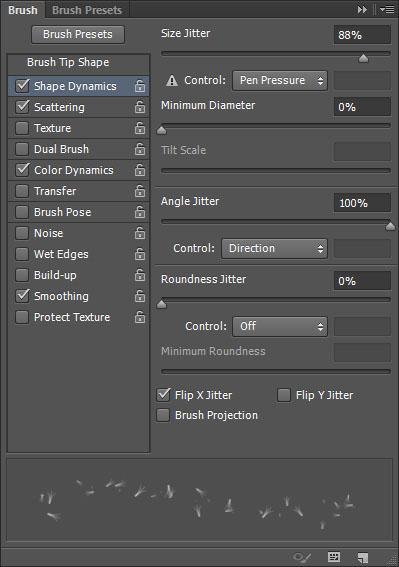
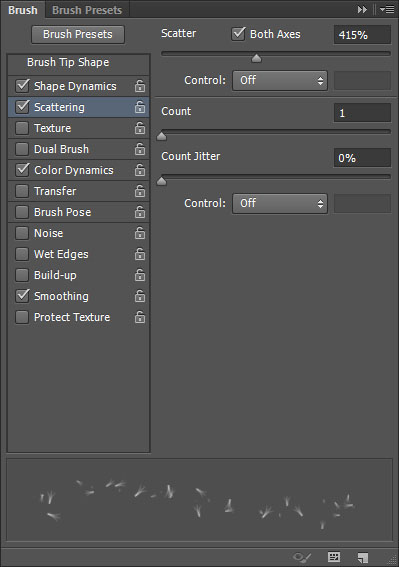
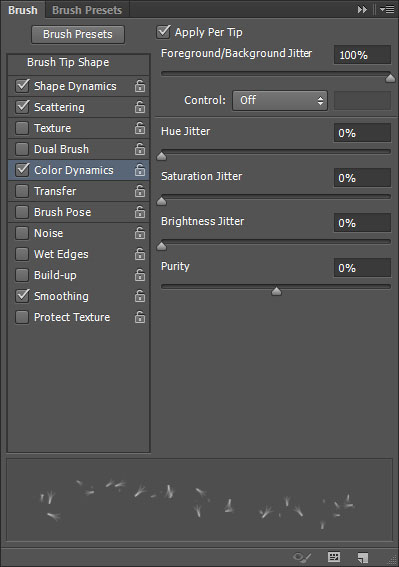
Pick the Brush Tool, and open the Brush panel (Window > Brush). Choose the “Dune Grass” tip, and change its Settings as below:
- Brush Tip Shape:
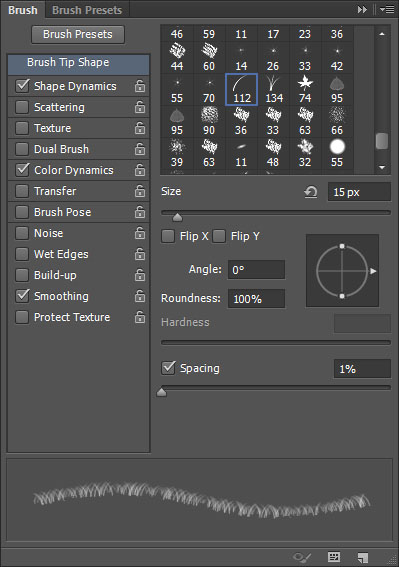
- Shape Dynamics:

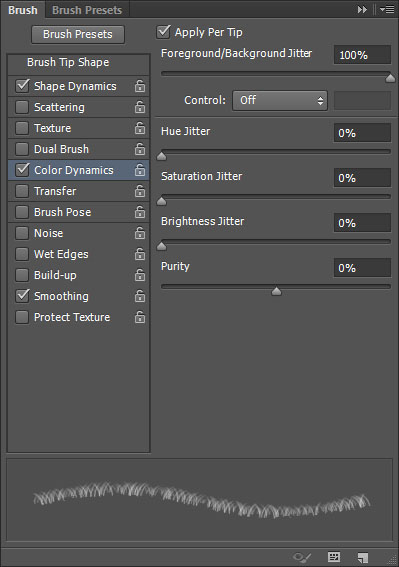
- Color Dynamics:
Step 4
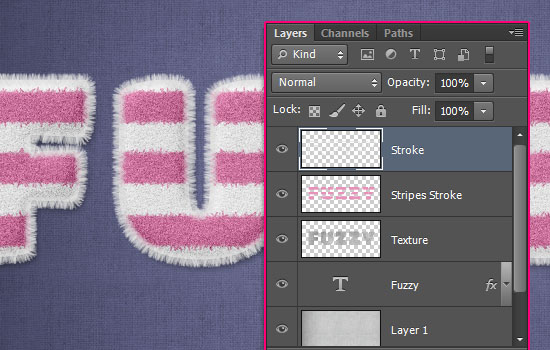
Right click the text layer and choose “Create Work Path”. Then, create a new layer on top of all layers and call it “Stroke”. Make sure that the Brush Tool is still selected.
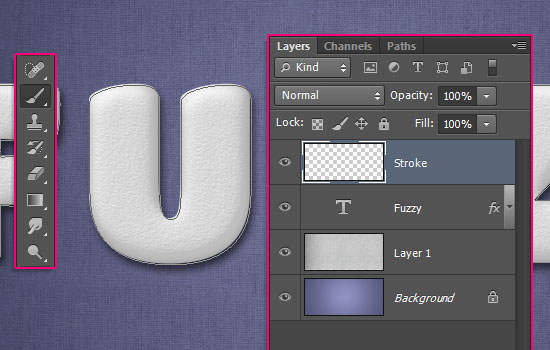
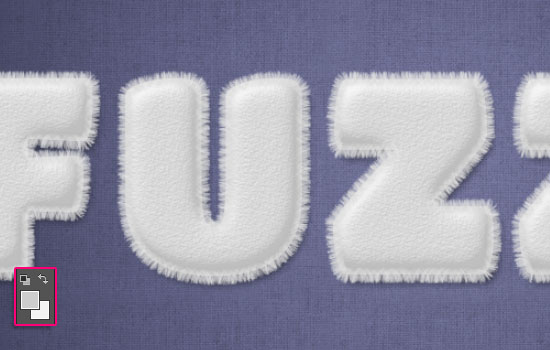
Set the Foreground color to #cdcdcd and the Background color to #f3f3f3. then, hit the Enter/Return key a couple of times (5 – 7) to stroke the path with the modified brush tip. When you like how the stroke looks, pick the Direct Selection Tool (A), and hit Enter/Return one more time to get rid of the path.
Ctrl/Cmd + Click the text layer’s thumbnail to create a selection.
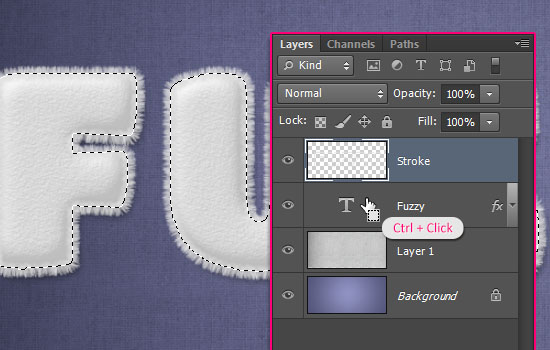
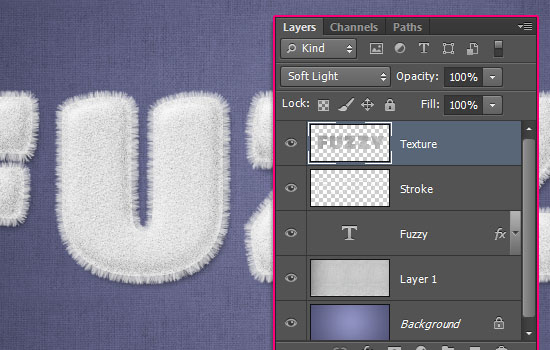
Create a new layer on top of all layers and call it “Texture”. Change the Foreground color to #d8d8d8 and the Background color to #858585, then go to Filter > Render > Clouds. Go to Select > Deselect (Ctrl/Cmd + D) to get rid of the selection.
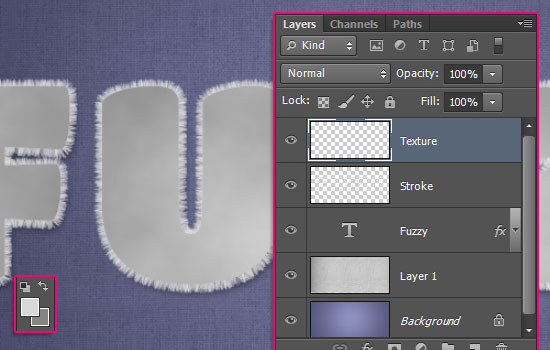
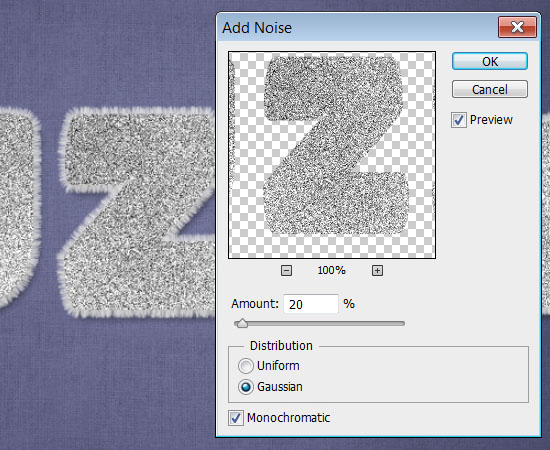
Go to Filter > Noise > Add Noise. Change the Amount to 20, the Distribution to Gaussian, and check the Monochromatic box.
Change the “Texture” layer’s Blend Mode to Soft Light. This will help with the fuzzy appearance of the text.
Step 5
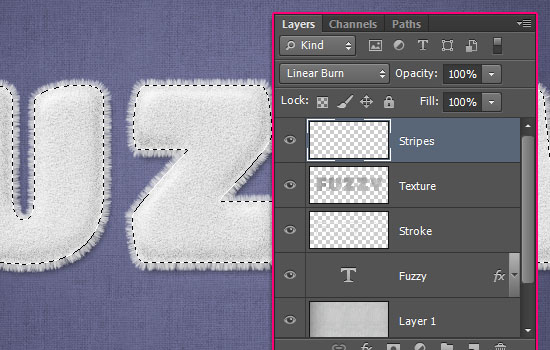
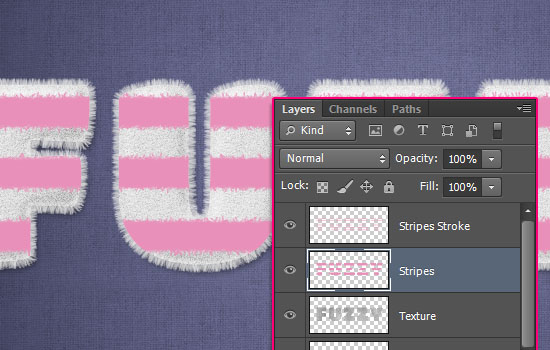
Create a selection once again, then create a new layer on top of all layers, call it “Stripes”, and change its Blend Mode to Linear Burn. This will help you choose the right color as you will see the result along with the Blend Mode.
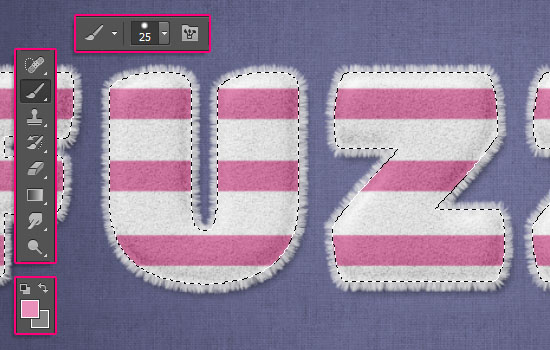
Set the Foreground color to whatever color you want the stripes to be (here it is #e890b9), just make sure not to pick very dark colors, as the Linear Burn Blend Mode will darken them anyway.
Then, pick a hard round brush, and change its size to a size you like as well, depending on how thick or thin you want the stripes to be.
After that, press and hold the Shift key, click outside the left side of the text where you want to add the stripe, then drag to the right side to create a straight line, and release all.
Repeat this step to create all the stripes you want to create. You can use different brush sizes to add some variations.
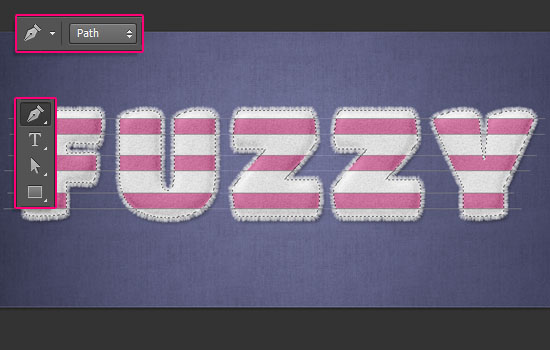
Pick the Pen Tool and choose the Path option in the Options bar. You’ll then need to create a straight line at the top and bottom of each stripe you created.
To do so, click once to the left of the stripe, press and hold the Shift key, and click again to the right side and release all.
Don’t worry if the line is not placed exactly on top of the stripe’s edge, as we’ll move the lines next. But make sure after you create each line, to press and hold the Ctrl/Cmd key, and click away from the line to separate it from the next one.
Once you’re done, you an pick the Path Selection Tool, click any line you want to move, and use the Arrow Keys to move it as you like. When all the lines are placed correctly, click outside them so that no line stays selected.
Step 6
Pick the Eraser Tool, open the Brush panel again, and choose a soft round 5 px brush, then modify its Settings as below:
- Brush Tip Shape:
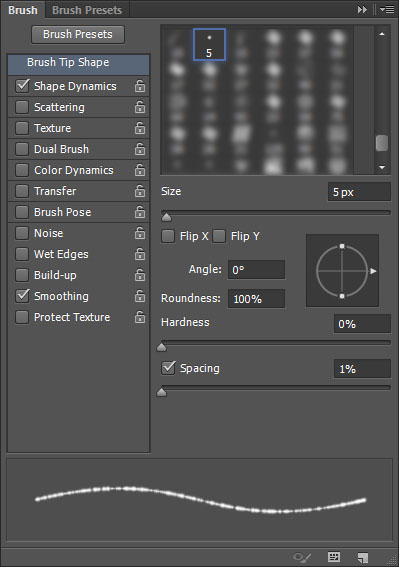
- Shape Dynamics:

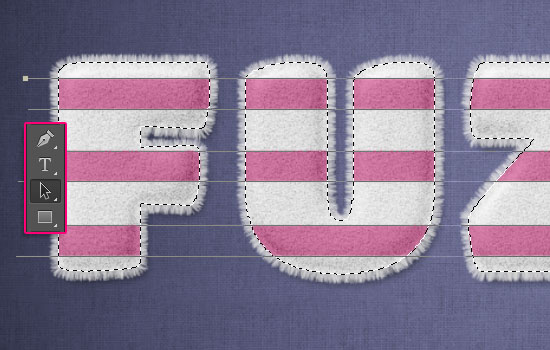
Hit the Enter/Return key once to stroke the path with the Eraser Tool’s brush. This will create soft jagged edges for the stripes, which will help make the final effect more realistic.
Step 7
Pick the Brush Tool, and from the Brush panel, choose the “Grass” brush tip, and modify its Settings as below:
- Brush Tip Shape:
- Shape Dynamics:
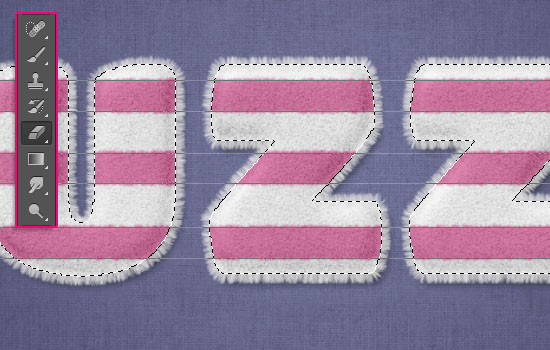
Create a new layer on top of all layers and call it “Stripes Stroke”, make sure that the Foreground color is the same as the stripes’ color, the hit the Enter/Return key a couple of times (3 – 5) to stroke the edges of the stripes.
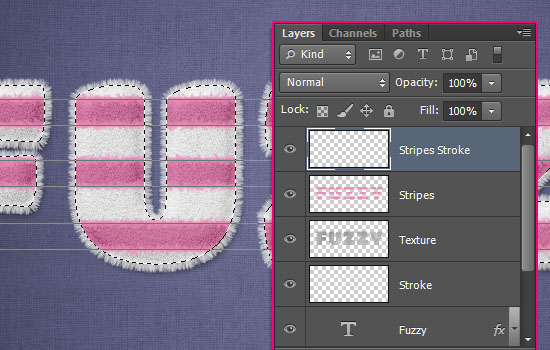
Once you like the result, pick the Direct Selection Tool (A) and hit Enter/Return to get rid of the path, go to Select > Deselect to get rid of the selection, and then go to Filter > Sharpen > Sharpen to make the edges more defined.
After that, change the “Stripes” layer’s Blend Mode to Normal.
Select both the “Stripes” and the “Stripes Stroke” layers, go to Layer > Merge Layers, then change the merged layer’s Blend Mode back to Linear Burn.

With the Foreground color still set to the stripes’ color, and the Background color set to White, go to Filter > Noise > Add Noise. Change the Amount to 5, the Distribution to Gaussian, and check the Monochromatic box.

Step 8
Drag the “Stroke” layer on top of all layers.
Duplicate the text and the “Stroke” layers, then right click the text layer and choose Clear Layer Style.
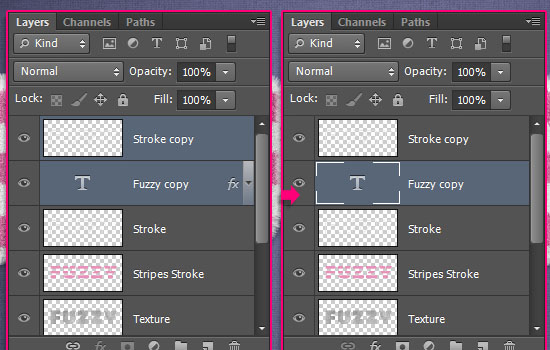
Select the copy text and “Stroke” layers, merge them, rename the merged layer to “Shadow”, and drag it right below the original text layer.
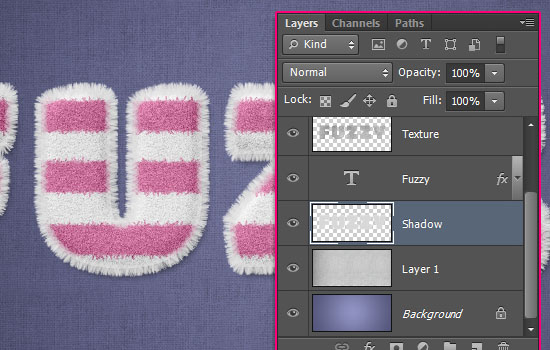
Double click the “Shadow” layer to apply a Drop Shadow effect, by changing the color to #767676, the Opacity to 58%, the Distance to 15, and the Size to 10.
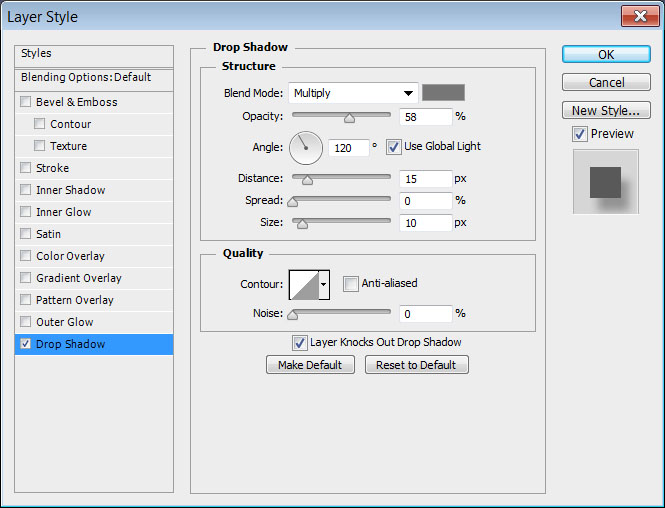
This will add some more depth to the text.
Step 9
Pick the Brush Tool one more time, and modify the “Grass” tip’s Settings as below:
- Brush Tip Shape:

- Shape Dynamics:
- Scattering:
- Color Dynamics:
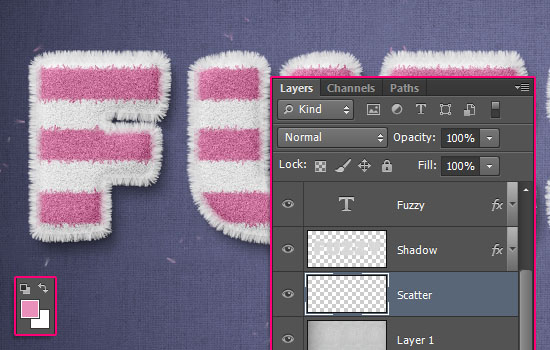
Make sure that the Foreground color is still set to the stripes’ color, and the Background color set to White, then create a new layer below the “Shadow” layer and call it “Scatter”.
Click and drag very slightly around the text to add some scattered pieces.
And you’re done!
Hope you enjoyed the tutorial and found the tips and tricks used helpful ![]()
You must Sign up as a member of Effecthub to view the content.

A PHP Error was encountered
Severity: Notice
Message: Undefined index: HTTP_ACCEPT_LANGUAGE
Filename: helpers/time_helper.php
Line Number: 22
5063 views 15 comments
You must Sign up as a member of Effecthub to join the conversation.
A PHP Error was encountered
Severity: Notice
Message: Undefined index: HTTP_ACCEPT_LANGUAGE
Filename: helpers/time_helper.php
Line Number: 22
nicee pic
A PHP Error was encountered
Severity: Notice
Message: Undefined index: HTTP_ACCEPT_LANGUAGE
Filename: helpers/time_helper.php
Line Number: 22
gracias por la post www.jkdrama.top