Photoshop Weather Effects – Rain
source: http://www.photoshopessentials.com/photo-effects/photoshop-weather-effects-rain/
Written by Steve Patterson. In this photo effects tutorial, we’ll learn how to add a simple yet convincing rain effect to a photo, a great way to add mood and atmosphere, without getting your camera wet! I’ll be using Photoshop CS6 but this tutorial is also fully compatible with Photoshop CC (Creative Cloud). If you’re using Photoshop CS5 or earlier, you’ll want to check out our originalAdding Rain To A Photo tutorial.
To create the effect, we’ll be using Smart Filters and adjustment layers to keep it fully editable so you can easily adjust and fine-tune the amount of rain in your image, the direction it’s falling from, and the overall brightness and contrast of the effect.
Download our tutorials as print-ready PDFs! Learning Photoshop has never been easier!
Here’s the image I’ll be starting with (woman with umbrella photo from Shutterstock):
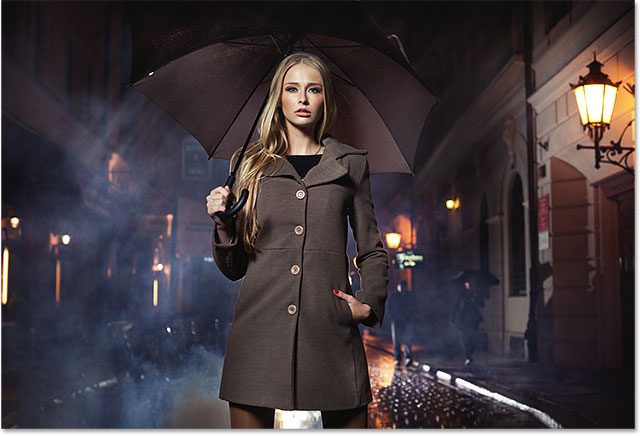
The original photo.
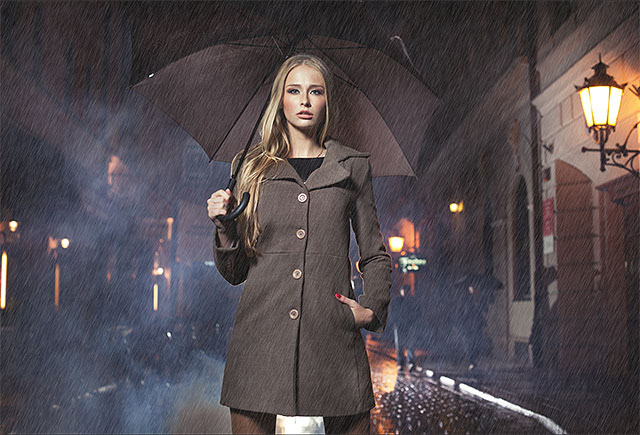
And here’s what it will look after adding the rain:
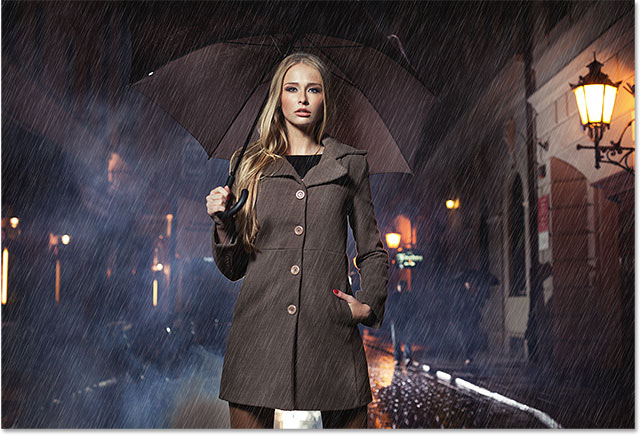
The final effect.
Let’s get started!
Step 1: Add A New Blank Layer
Let’s start by adding a new blank layer for our rain effect. If we look in the Layers panel, we see our newly-opened image sitting on the Background layer:
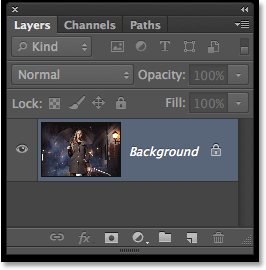
The original image appears on the Background layer.
To add a new layer, press and hold the Alt (Win) / Option (Mac) key on your keyboard and click the New Layericon at the bottom of the Layers panel:
![]()
Clicking the New Layer icon while pressing and holding Alt (Win) / Option (Mac).
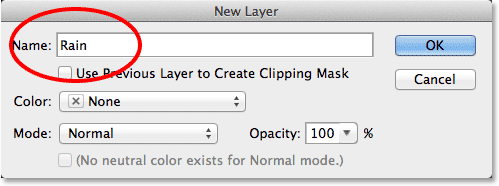
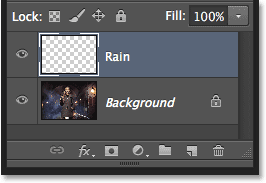
Holding the Alt (Win) / Option (Mac) key while clicking the New Layer icon tells Photoshop to pop open the New Layer dialog box, giving us a chance to name the layer before it’s added. Name the layer “Rain”, then click OK to close out of the dialog box:
Naming the new layer.
A new blank layer named Rain appears above the Background layer:
The new layer is added.
Step 2: Fill The New Layer With Black
At the moment, our new layer is blank. We need to fill it with black, and we can do that using Photoshop’s Fill command. Go up to the Edit menu in the Menu Bar along the top of the screen and choose Fill:
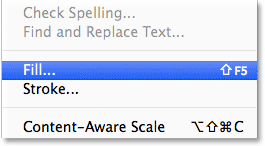
Going to Edit > Fill.
This opens the Fill dialog box. Set the Use option at the top to Black, then in the bottom section of the dialog box, make sure Mode is set to Normal and Opacity is set to 100%:
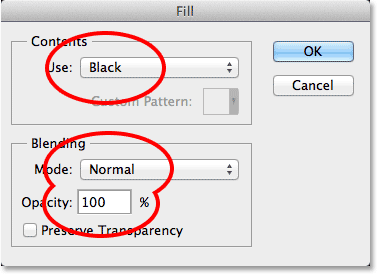
Changing the Use option to Black.
Click OK when you’re done to close out of the dialog box. Photoshop fills the Rain layer with black, temporarily hiding our image below it from view:
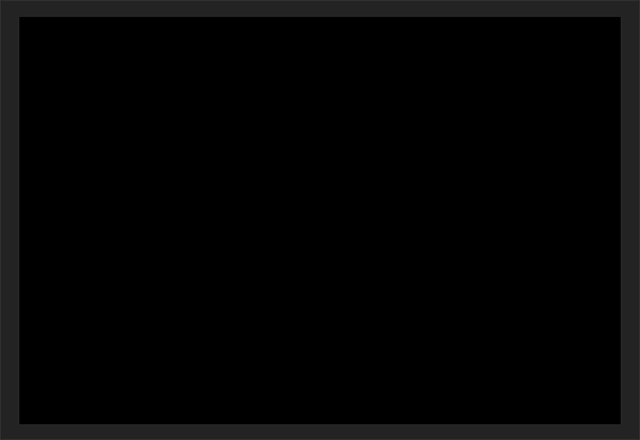
The photo is temporarily hidden by the black-filled Rain layer.
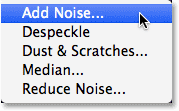
Step 3: Apply The Add Noise Filter
Next, we’ll use Photoshop’s Add Noise filter to add a bunch of random white dots (which Photoshop calls “noise”) to the layer. Go up to the Filter menu at the top of the screen, choose Noise, then choose Add Noise:
Going to Filter > Noise > Add Noise.
Photoshop pops open the Add Noise dialog box. We control how much noise is added to the layer with the Amountvalue. Set the Amount to 25% either by entering the value directly into the box or by dragging the slider below it. In the Distribution section near the bottom of the dialog box, select Gaussian, then select Monochromatic at the very bottom by clicking inside its checkbox:
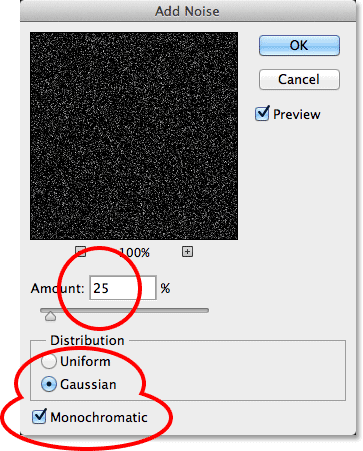
The Add Noise options.
Click OK to close out of the dialog box. Photoshop fills the Rain layer with noise. It appears faint at the moment, but we’ll fix that in a bit:
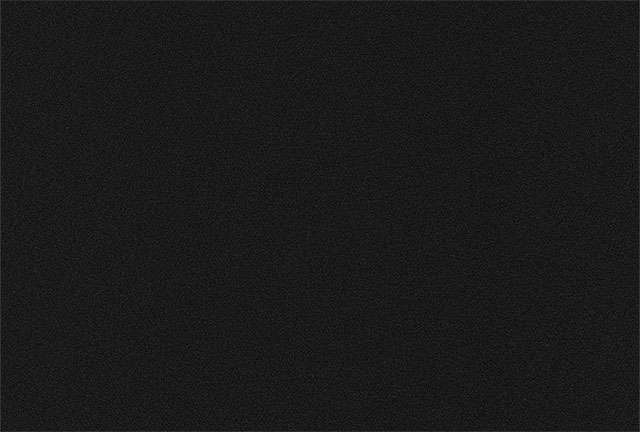
The image after applying the Add Noise filter.
Step 4: Scale The Rain Layer To 400%
The random white dots we just added will become our rain, but at the moment, they’re too small. Let’s make them larger. Go up to the Edit menu at the top of the screen, choose Transform, then choose Scale:
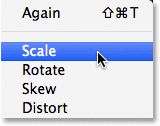
Going to Edit > Transform > Scale.
With the Scale command selected, click on the link icon between the Width (W) and Height (H) options in the Options Bar along the top of the screen to link the Width and Height together so that changing the value of one will automatically change the other:
![]()
Linking the Width and Height options in the Options Bar.
Then change the value for the Width to 400%. Photoshop will automatically change the Height to 400% as well:
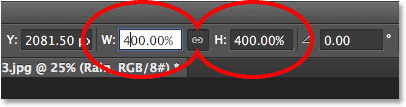
Increasing the Width and Height to 400%.
Click the checkmark in the Options Bar when you’re done to accept the scaling:
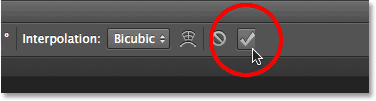
Clicking the checkmark.
With the Rain layer scaled to 400% of its original size, the noise now appears larger:
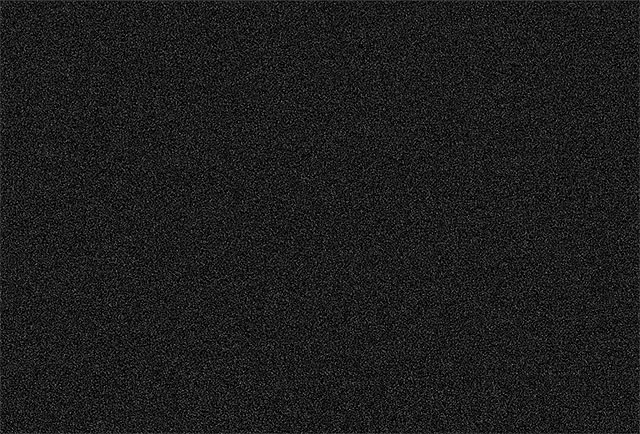
The image after scaling the Rain layer by 400%.
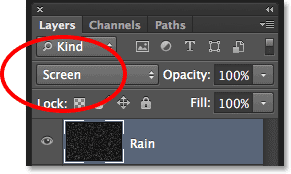
Step 5: Change The Blend Mode To Screen
Of course, one big problem at the moment is that we still can’t see our original image. To fix that, change the blend mode of the Rain layer from Normal (the default) to Screen:
Changing the layer blend mode to Screen.
The Screen blend mode hides all the areas of black in the noise, leaving only the white dots visible and allowing us to see the original image through it:

The effect after changing the blend mode to Screen.
The Five Essential Blend Modes For Photo Editing
Step 6: Convert The Rain Layer Into A Smart Object
In a moment, we’re going to change those white dots into rain by applying Photoshop’s Motion Blur filter, but coming up with the exact value you’ll want to use with the Motion Blur filter may take some experimenting depending on the size of your image. The best thing to do in this case is to first convert the layer into a Smart Object. That way, the Motion Blur filter will be applied as a Smart Filter which will keep it fully editable, allowing us to try different values as much as we want without making any permanent changes.
With the Rain layer selected, click on the small menu icon in the top right corner of the Layers panel:
![]()
Clicking the Layers panel menu icon.
Choose Convert to Smart Object from the menu that appears:
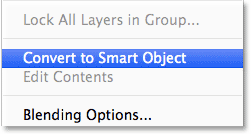
Selecting the Convert to Smart Object command.
Nothing will seem to happen to the image itself, but a small Smart Object icon appears in the lower right corner of the Rain layer’s preview thumbnail letting us know it’s now a Smart Object:
![]()
The Smart Object icon in the preview thumbnail.
Step 7: Apply The Motion Blur Filter
Now that we’ve converted the layer to a Smart Object, we can blur the noise using the Motion Blur filter. Go up to the Filter menu, choose Blur, then choose Motion Blur:
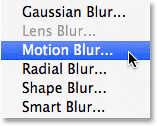
Going to Filter > Blur > Motion Blur.
This opens the Motion Blur dialog box. First, set the direction the rain is falling with the Angle option. You can enter a value directly into the box or turn the dial to the right of it (it’s more fun to turn the dial). I’ll set my angle to 65° but of course you may need a different value with your photo. Then, set the amount of motion blur using the Distanceoption. You can drag the slider along the bottom to change the value and preview the results in your image. I’ll set mine to an initial value of 75 pixels but this will depend a lot on the size of your image. Don’t worry about getting it exactly right because we can always come back and change the value later if we need to:
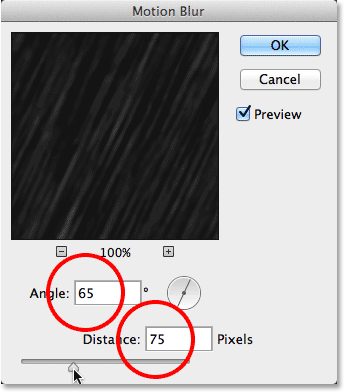
The Motion Blur options.
Click OK to close out of the dialog box. Photoshop applies the motion blur effect to the noise (it may take a few seconds):
Our rain now has some motion to it.
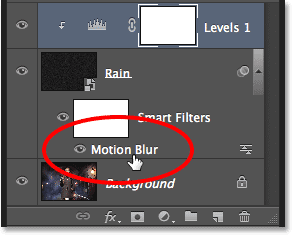
If we look in the Layers panel, we see the Motion Blur filter listed as a Smart Filter below the Rain Smart Object:
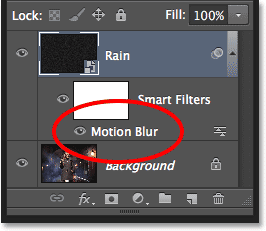
The Layers panel showing the Motion Blur Smart Filter.
Step 8: Add A Levels Adjustment Layer
Lets reduce the amount of rain and add some brightness and contrast to it using Levels. Press and hold the Alt(Win) / Option (Mac) key on your keyboard and click the New Adjustment Layer icon at the bottom of the Layers panel:
![]()
Clicking the New Adjustment Layer icon while holding Alt (Win) / Option (Mac).
Photoshop will again pop open the New Layer dialog box, this time for the Levels adjustment layer. You can just accept the default name Levels 1, but make sure you select the Use Previous Layer to Create Clipping Maskoption by clicking inside its checkbox. This way, anything we do with the Levels adjustment layer will affect only theRain layer below it. It will have no effect on the original image on the Background layer. Click OK when you’re done to close out of the dialog box:
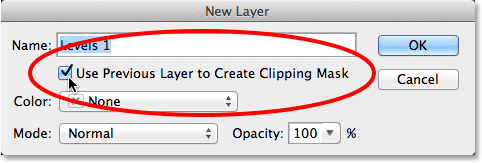
Selecting the Use Previous Layer to Create Clipping Mask option.
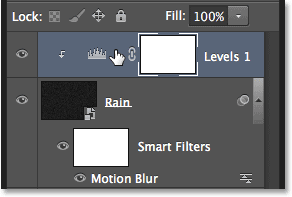
Looking in the Layers panel, we see the new Levels adjustment layer (Levels 1) above the Rain layer. The adjustment layer appears indented to the right with a small arrow pointing down at the Rain layer below it. This tells us the adjustment layer is clipped to the Rain layer:
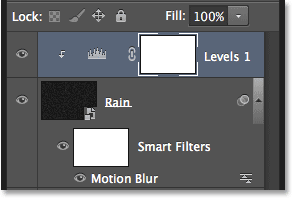
The Layers panel showing the Levels adjustment layer.
Photoshop clipping mask essentials
Step 9: Drag The Black And White Point Sliders
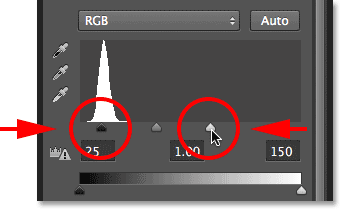
The controls for the Levels adjustment layer appear in Photoshop’s Properties panel. In the center of the panel is the histogram – a graph showing us the tonal range of the image (or in this case, of the Rain layer), increasing in brightness levels from pure black on the far left to pure white on the far right. The white “mountain range” indicates the brightness levels where there is actual information (pixels) in the image. The higher the mountain peak, the more pixels we have at that particular brightness level.
If you look directly below the histogram, you’ll see three little sliders. The one on the far left, filled with black, is theblack point slider. On the far right, filled with white, we have the white point slider. There’s also a gray-filled slider in the middle but for our purposes here, we can ignore it. We only need the black and white point sliders:
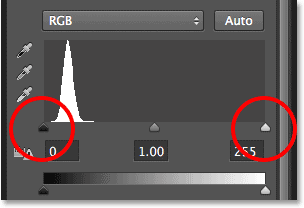
The black point (left) and white point (right) sliders below the histogram.
Click on the black point slider and begin dragging it slowly towards the right. As you drag, you’ll see the darkest areas of rain getting even darker and eventually disappearing completely, reducing the amount of rain in the effect. Then click on the white point slider and begin dragging it slowly towards the left, which will gradually increase the brightness and contrast of the rain. You’ll want to play around with the sliders a bit, going back and forth between them to find the settings that look good to you, but just like with Smart Filters in Photoshop, adjustment layers are fully editable and non-destructive so you can always re-adjust the sliders later if you need to:
Dragging the black point and white point sliders.
Here’s my effect after dragging the sliders:

The image after enhancing the rain effect with Levels.
Step 10: Re-Adjust The Motion Blur Or Levels Settings If Needed
At this point, it’s simply a matter of fine-tuning the rain effect. If you need to adjust the motion blur amount, justdouble-click on the Motion Blur Smart Filter in the Layers panel:
Double-clicking the Motion Blur Smart Filter.
This will re-open its dialog box allowing you to increase (or decrease) the Distance value. In my case, my image is fairly large so my initial Distance value of 75 pixels was too low. I’ll increase it to 150 pixels. You can also adjust the angle while you’re here, but I’ll leave mine set to 65°:
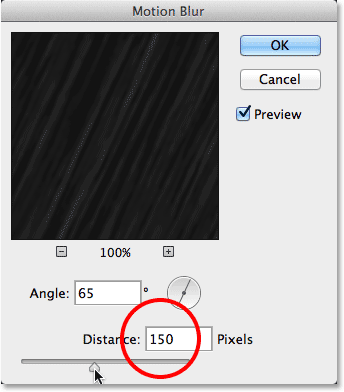
Editing my initial Distance value for the Motion Blur filter.
Making changes to the motion blur effect may require some further adjustments to the black point and white point sliders in Levels, so to access the sliders again, simply click on the Levels adjustment layer in the Layers panel to select it (don’t click on the white-filled layer mask thumbnail, though, otherwise the Properties panel will show options for the layer mask, not the Levels controls) :
Reselecting the Levels adjustment layer.
With the adjustment layer re-selected, the Levels sliders re-...
You must Sign up as a member of Effecthub to view the content.

A PHP Error was encountered
Severity: Notice
Message: Undefined index: HTTP_ACCEPT_LANGUAGE
Filename: helpers/time_helper.php
Line Number: 22
4203 views 1 comments
You must Sign up as a member of Effecthub to join the conversation.
A PHP Error was encountered
Severity: Notice
Message: Undefined index: HTTP_ACCEPT_LANGUAGE
Filename: helpers/time_helper.php
Line Number: 22
I love photoshop as well! These topics are very useful to me!