Modeling A High Poly Fantasy Inspired Axe In 3D Studio Max
In this tutorial we are going to create a very cool stylized axe model completely inside 3D Studio Max. We are going to use different modelling techniques and primitive objects to create the model as well as some interesting positioning tricks to arrange some of the model's elements.
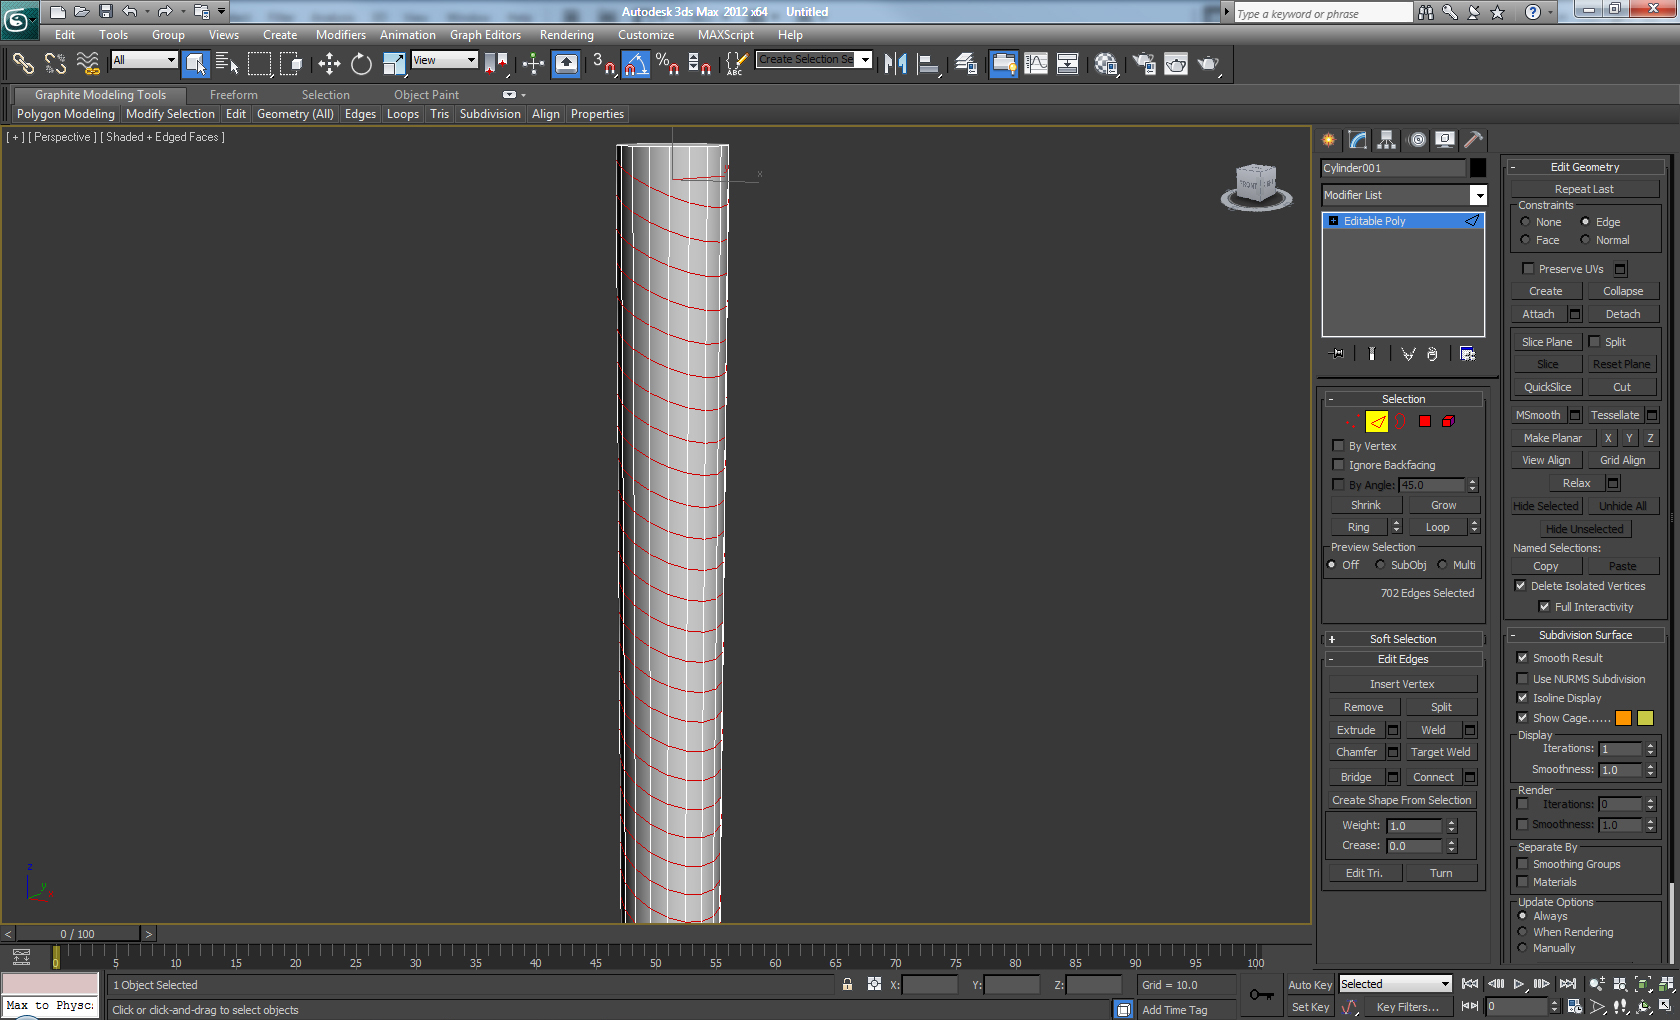
Step 1
First we create a Cylinder with 18 Sides and 40 Height Segments, and Convert it to Editable Poly by Right clicking and choosing Convert to > Convert to Editable Poly. After that select the edges loops shown Below.
 Click To Enlarge
Step 2
In the Modifier panel, under the Edit Geometry rollout. Check the Edge constraint option and rotate the edges around 25 degrees.
 Click To Enlarge
Step 3
Select the polygons shown in the picture and extrude them outwards.
 Click To Enlarge
Step 4
Select the polygon loops between the loops we extruded in the previous step, and extrude them outward with the same height amount.
 Click To Enlarge
Step 5
Now delete the top and bottom polygons of the cylinder, so we have holes on the top and bottom. After that add a Turbosmooth modifier and set the Iterations to 2.
 Click To Enlarge
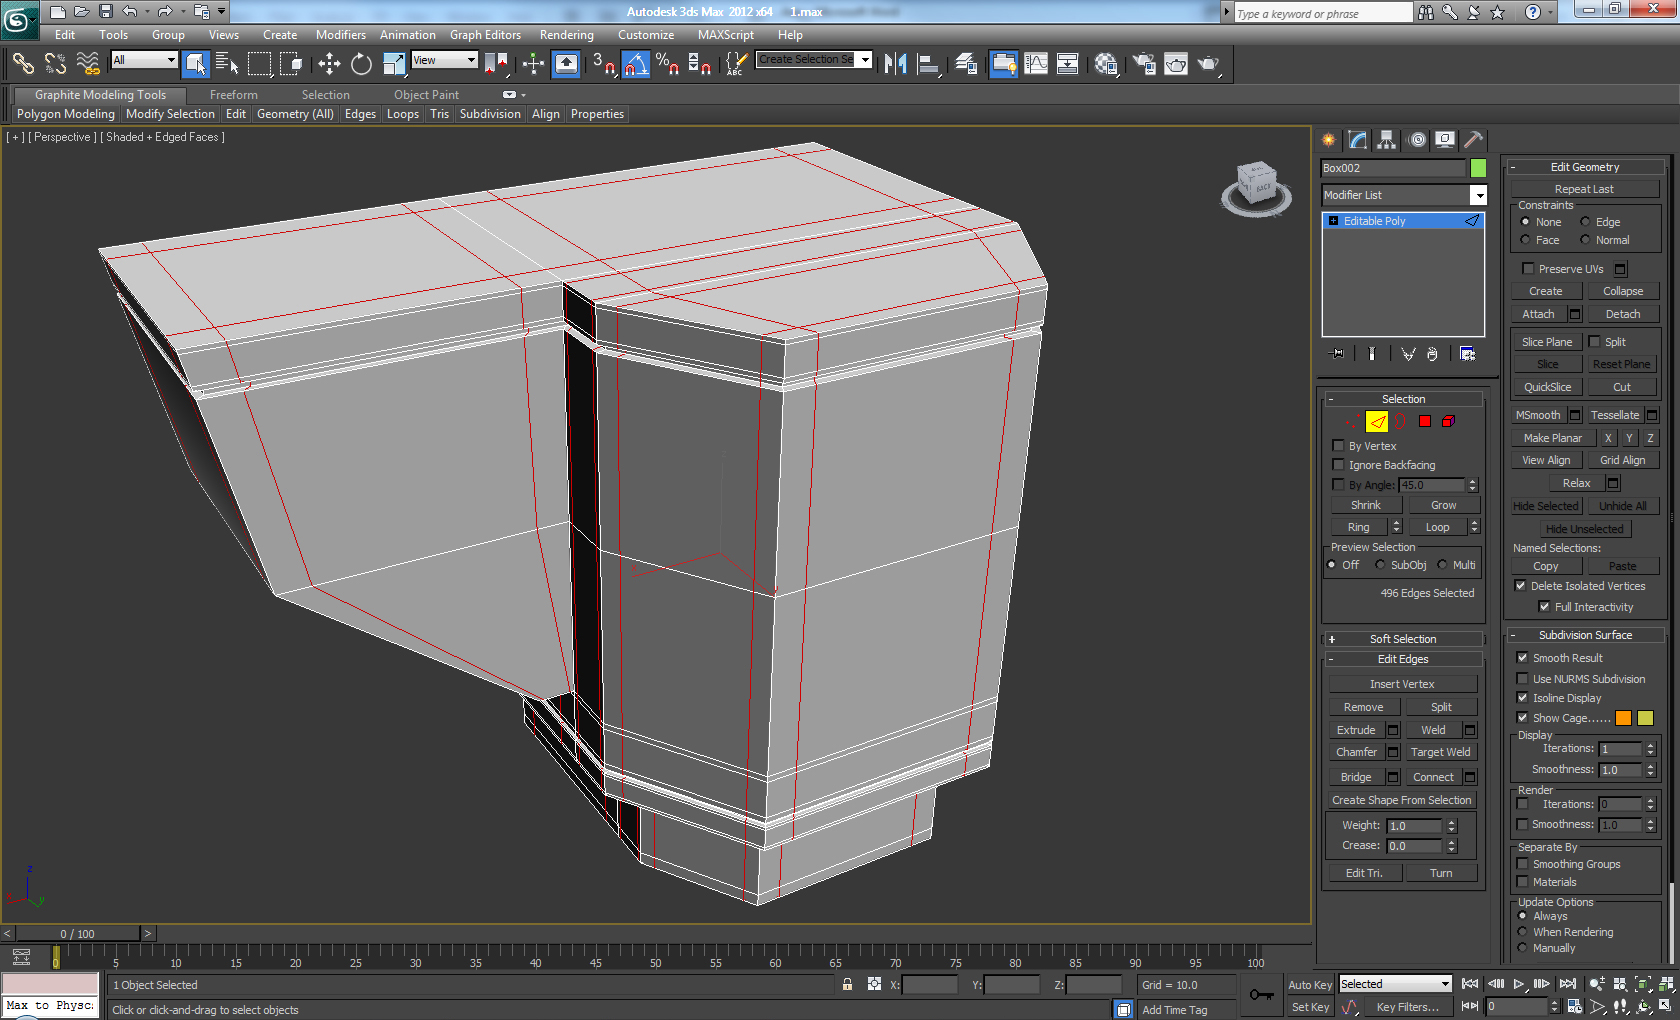
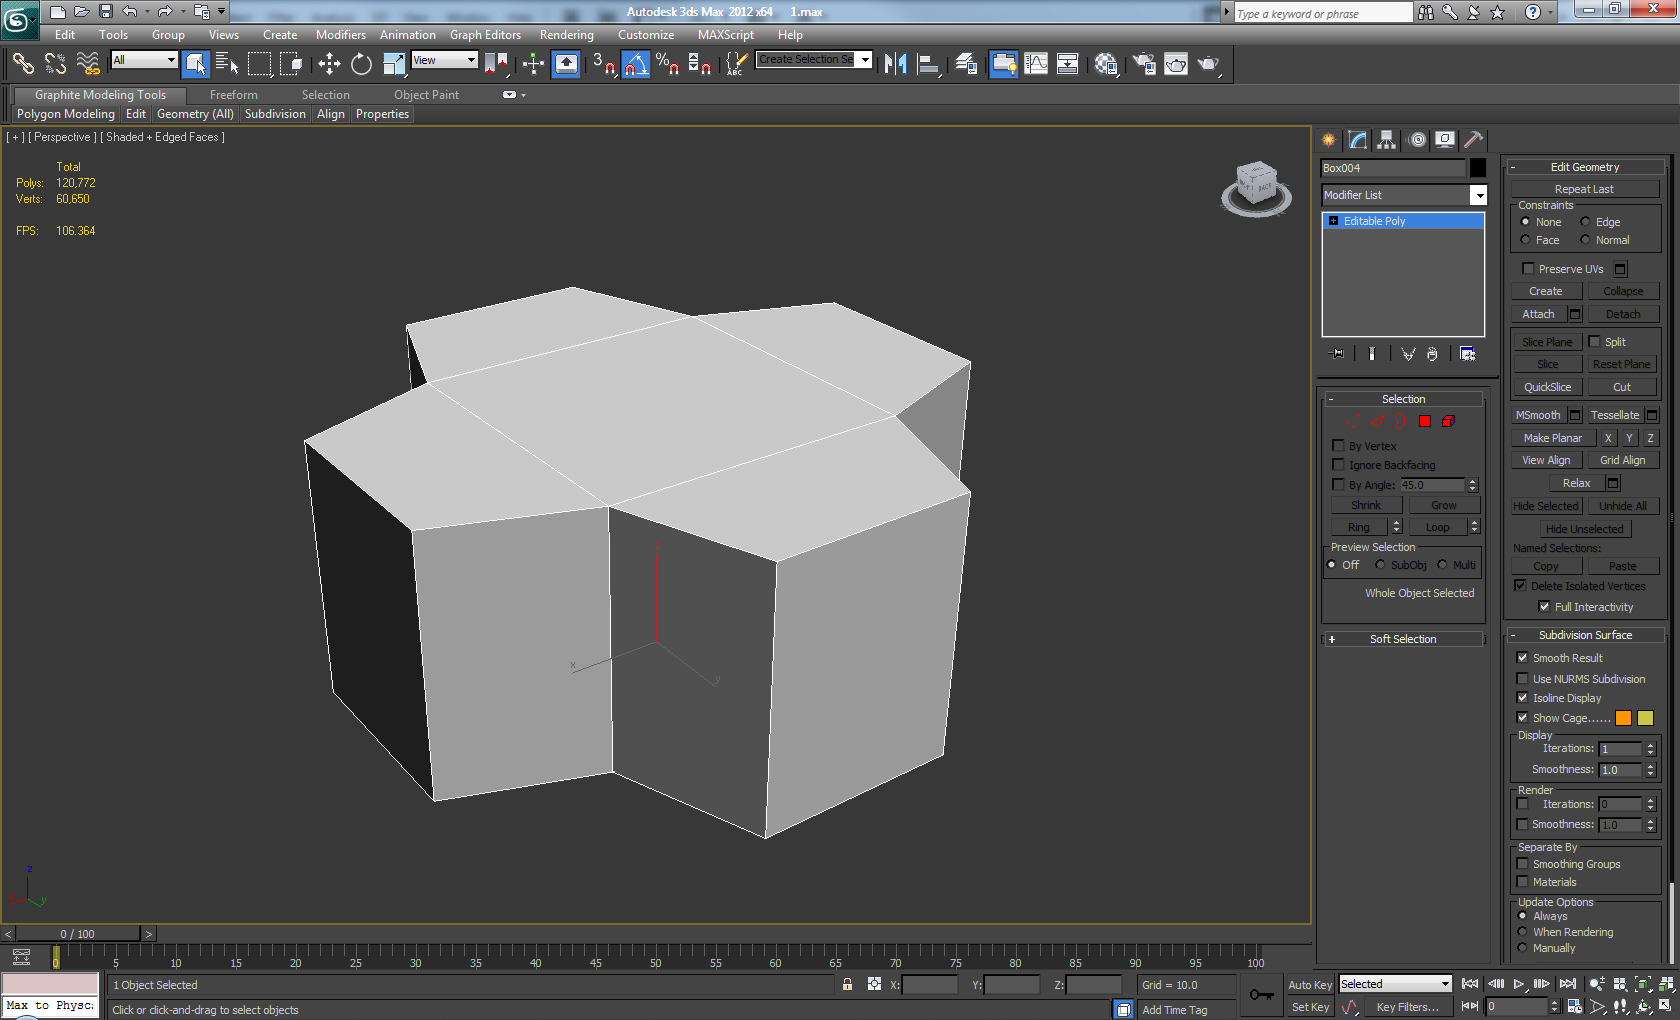
Step 6
Create a new Box and Convert it to Editable Poly (Right Click > Convert To > Convert To Editable Poly.) Select the front polygon and extrude it out and then Scale it on the X axis as shown.
 Click To Enlarge
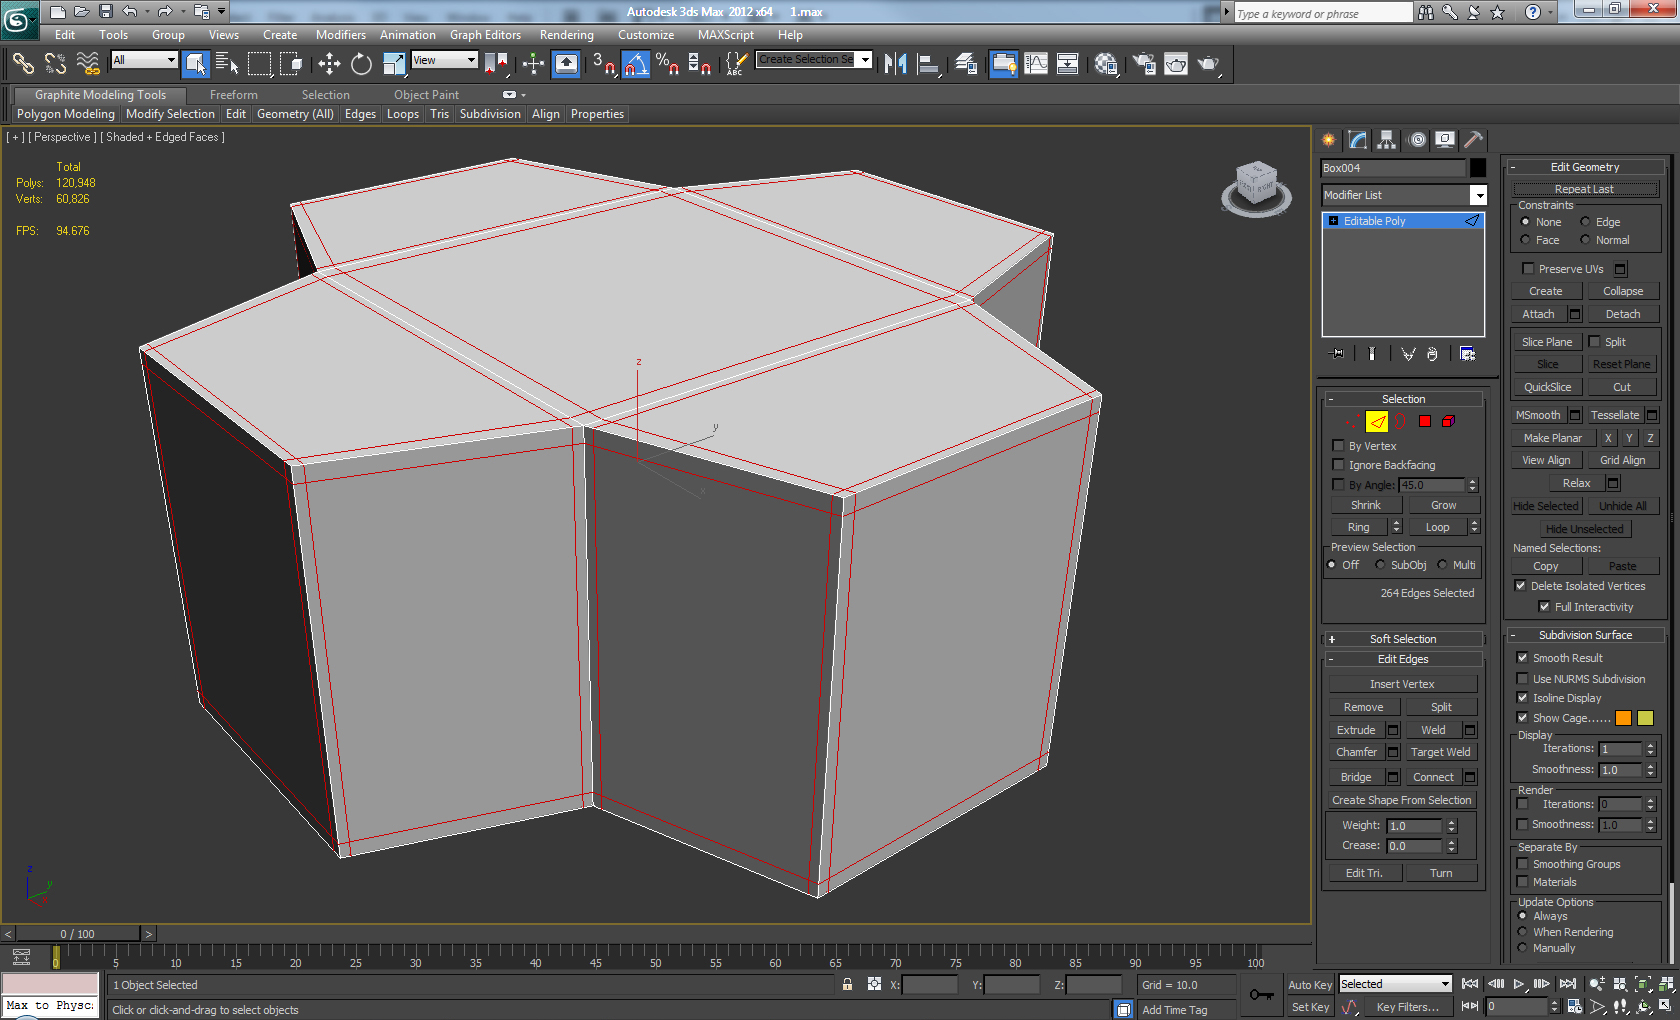
Step 7
Add two new Edge Loops as shown in the picture.
 Click To Enlarge
Step 8
Extrude the side polygon outward and add another Edge Loop through the center, as shown below.
 Click To Enlarge
Step 9
Tweak the vertices as shown to create an angle on the side. Select the bottom polygon and Inset it, then extrude it down. The result should look like the picture below.
 Click To Enlarge
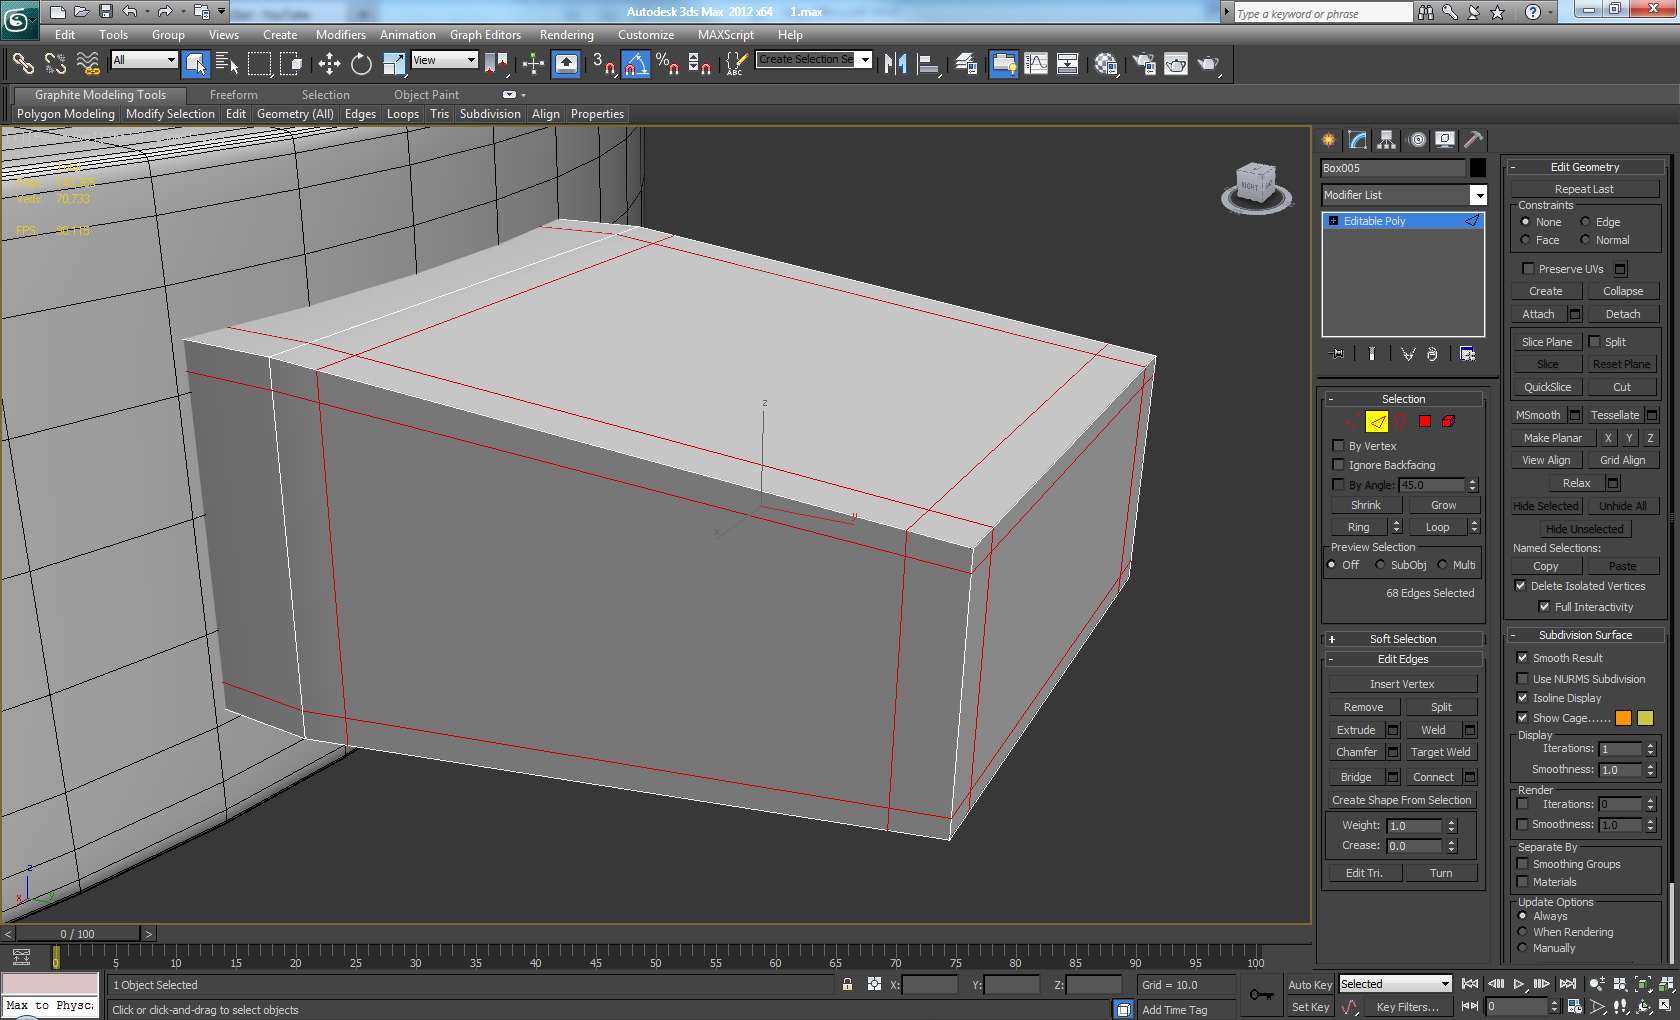
Step 10
Add two new Edge Loops on the top, and two more Loops on the bottom of the shape.
 Click To Enlarge
Step 11
Select the polygons between the loops we just created and extrude them inwards.
 Click To Enlarge
Step 12
Add two loops in each of the places shown in the picture below, with a pinch value of 70.
 Click To Enlarge
Step 13
Add more vertical loops with pinch value of 70 in the places shown below, so we can avoid errors in the mesh when we later add our Turbosmooth.
 Click To Enlarge
Step 14
We need to keep only one loop in the center in order for our shape to be oval when we smooth it. Therefore we'll add two more loops at the top and bottom with a Slide value of 90 and -90.
 Click To Enlarge
Step 15
Now Add a Turbosmooth and set the Iterations to 2.
 Click To Enlarge
Step 16
Create a new cylinder with 60 sides and place it as shown.
 Click To Enlarge
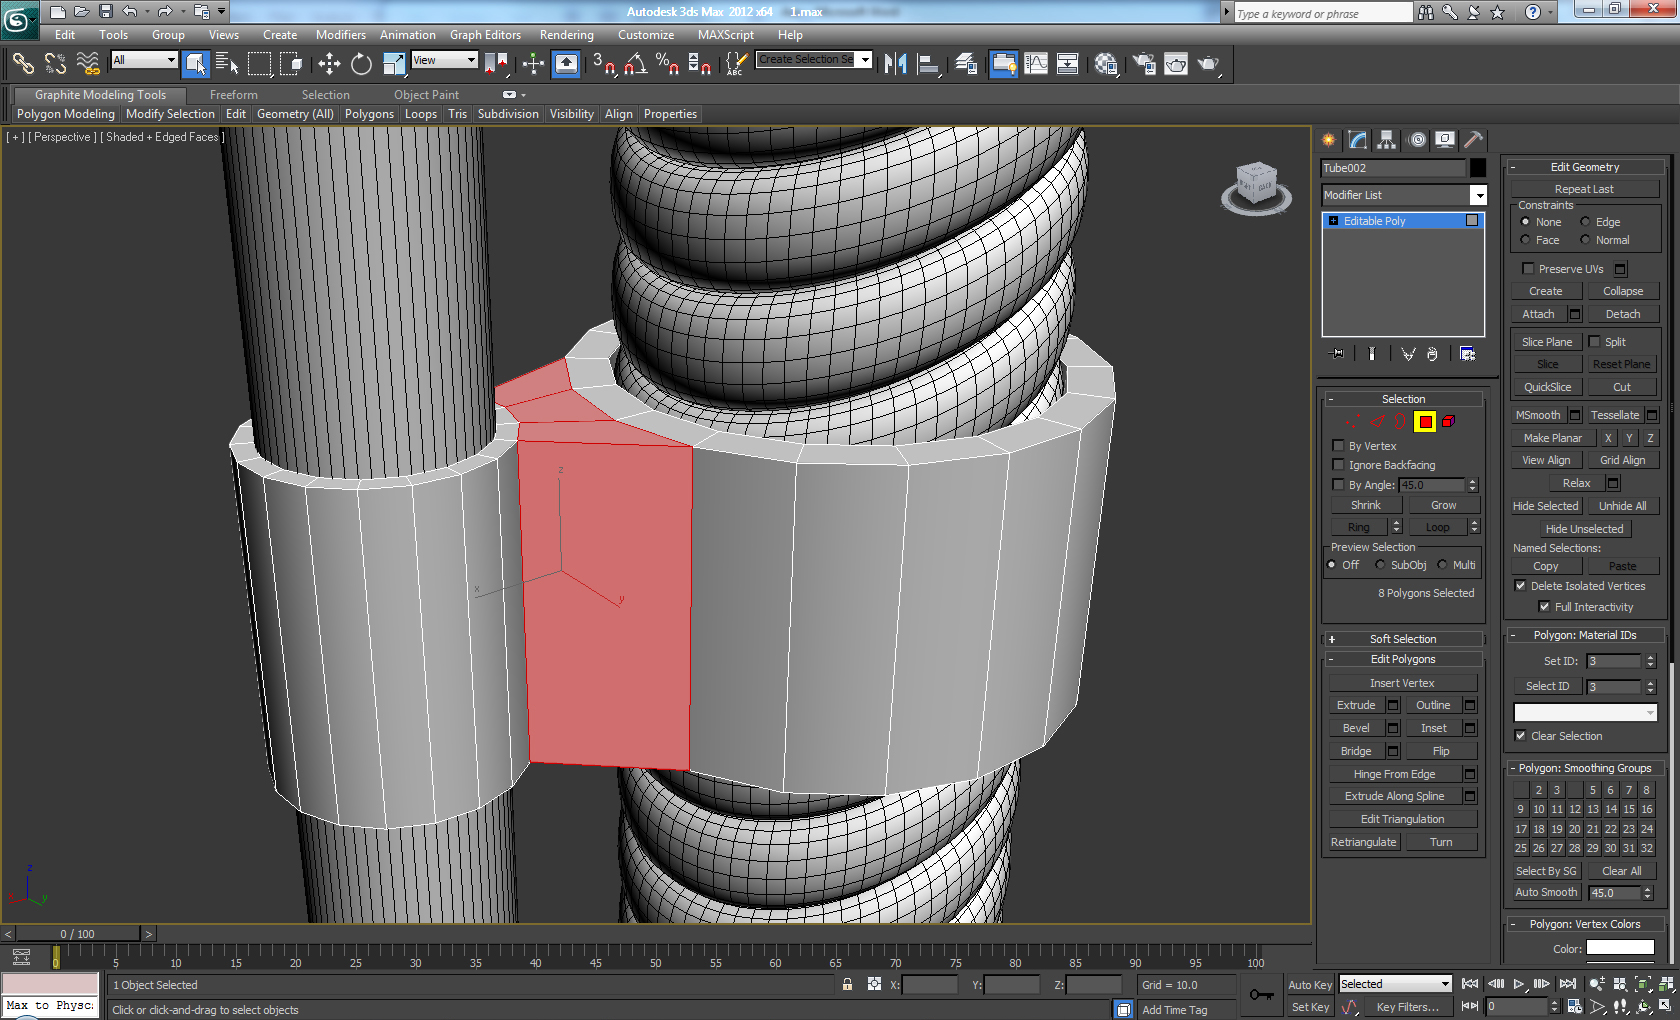
Step 17
Next Create two Tubes and set the Inner Radius to be the same as the Radius of our Cylinder. Then convert one of them to Editable Poly and from the Edit Geometry menu, and attach both Tubes together using Attach. Then select the three polygons on each Tube that face each other, and from the Edit Polygons menu, choose Bridge. If there is anything wrong like twisting etc. you can fix it with the twist option in the Bridge menu.
 Click To Enlarge
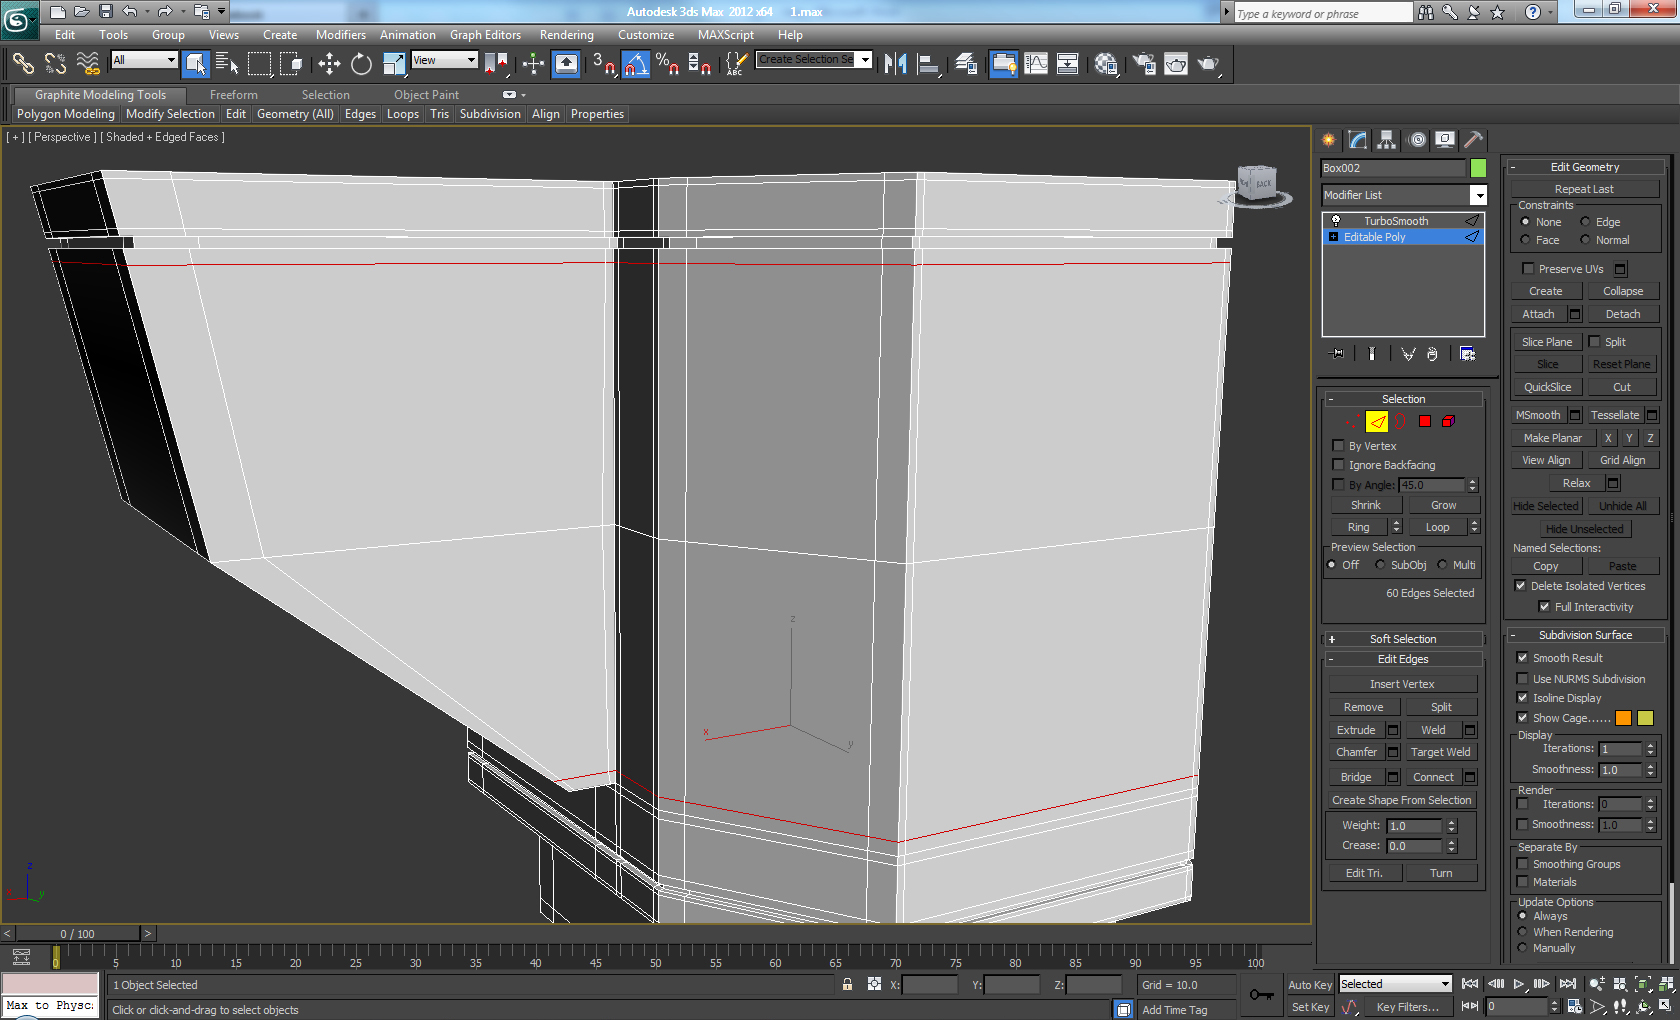
Step 18
Next Add new Edges Loops as shown.
 Click To Enlarge
Step 19
Add a Turbosmooth modifier and set the Iterations to 2, and place the element in the center of the two cylinders.
 Click To Enlarge
Step 20
Create new Box and Convert it to Editable Poly. After that add two Edge Loops and Extrude the polygons as shown in the picture. Then tweak the vertices so the shape looks like this.
 Click To Enlarge
Step 21
Add more Loops as shown, in order to have a nice shape after we add a Turbosmooth.
 Click To Enlarge
Step 22
Delete the top polygons, because they won't be visible. And add a Turbosmooth with the Iterations set to 2, and place it on the top of our cylinders.
 Click To Enlarge
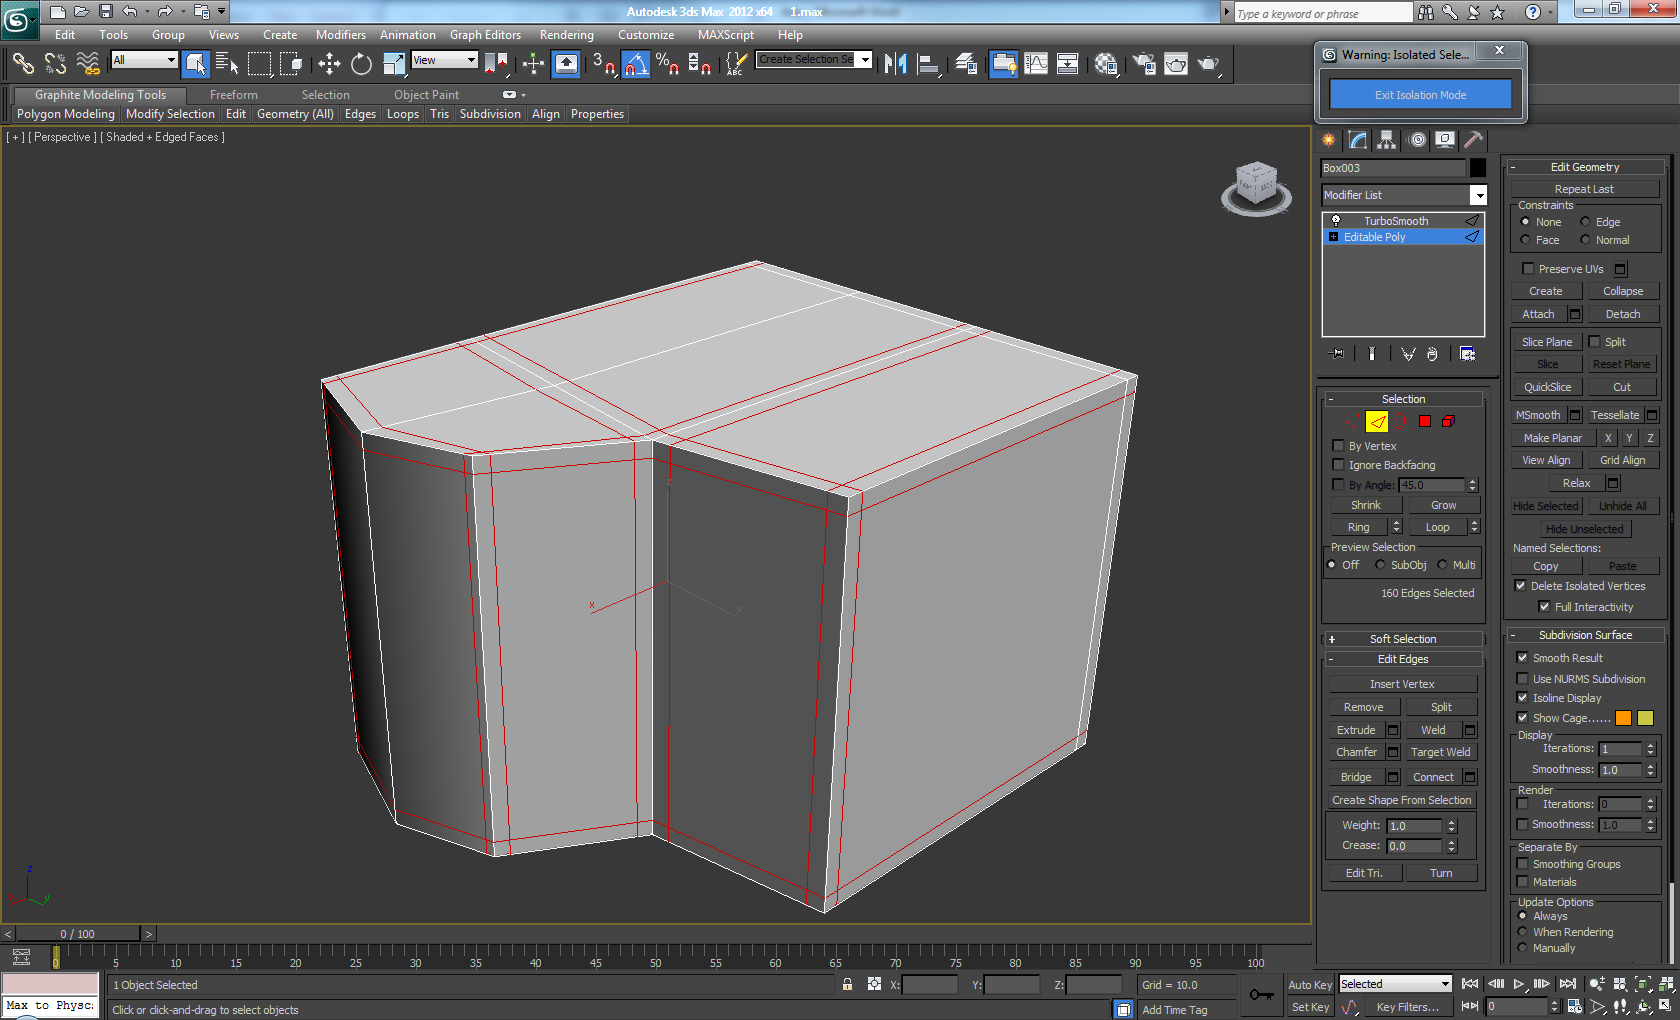
Step 23
Create another new Cylinder and click the "Auto Grid" option in order for the cylinder to be created on the same plane as the surface below it. Convert it to Editable Poly and Inset it six times with the same value.
 Click To Enlarge
Step 24
Extrude the rings of polygons inwards, as shown. And move the center polygon a bit inward as well using the Move tool.
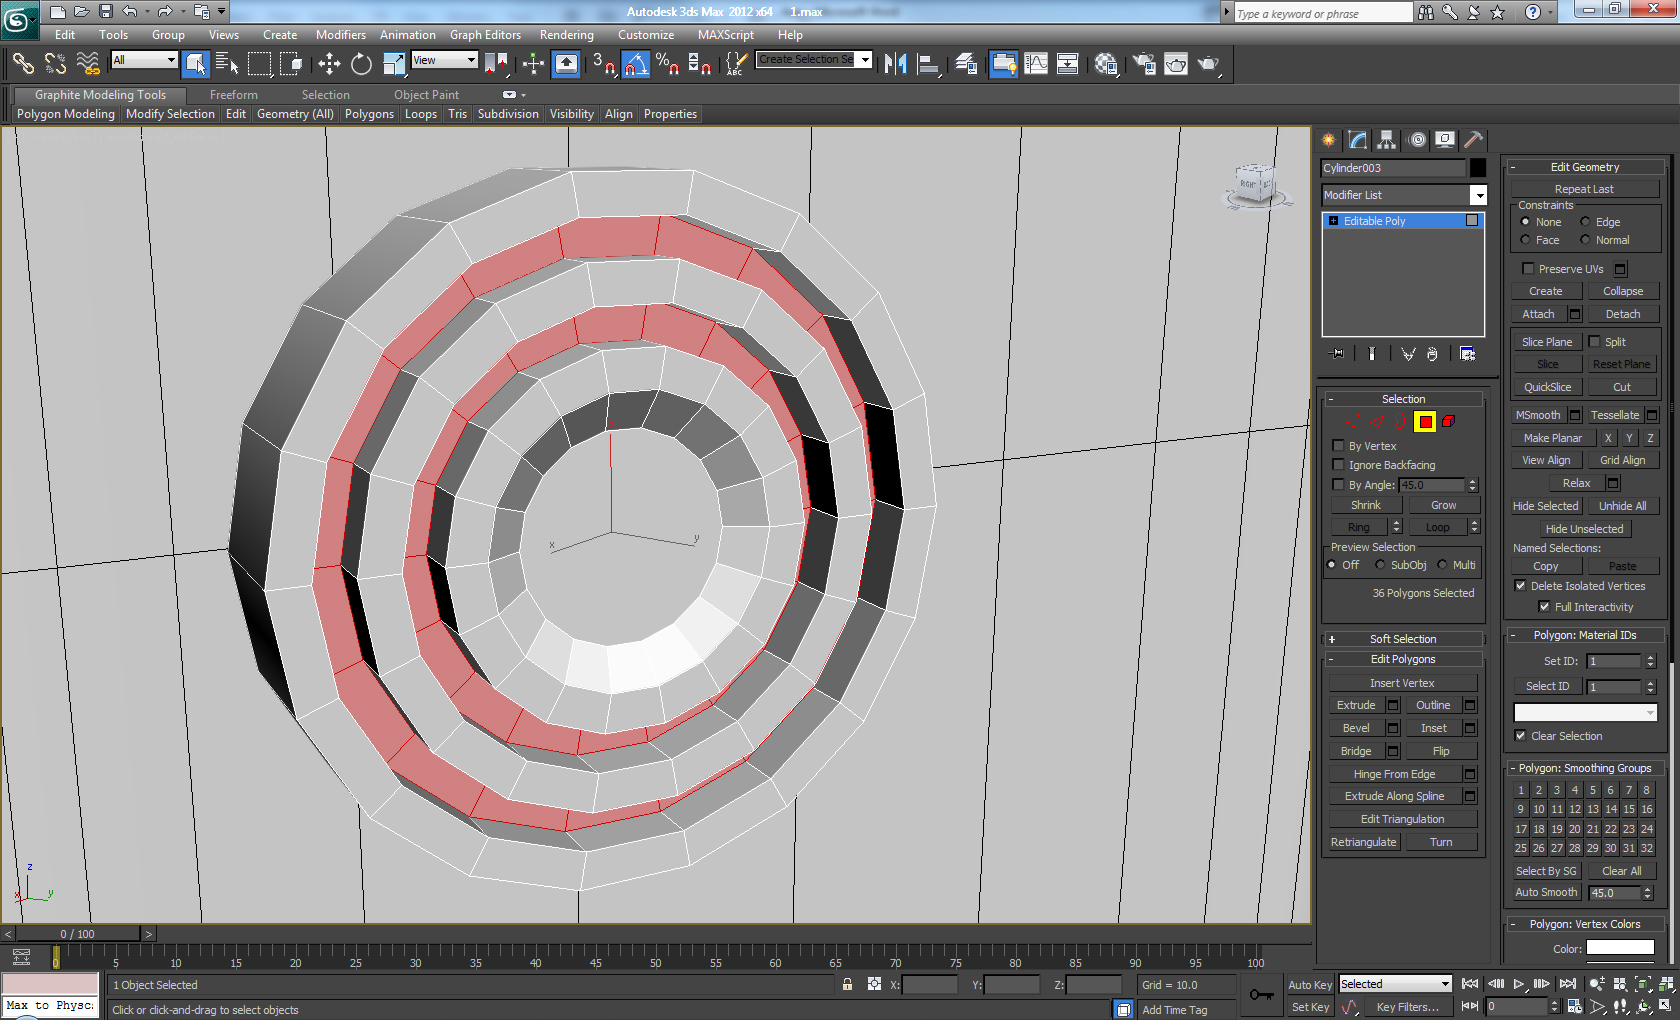 Click To Enlarge
Step 25
Select the edge loops shown and Chamfer them with a low value (Edit Edges> Chamfer). Select the center polygon and Inset it once again. Then Delete the back polygon which we won't be able to see.
 Click To Enlarge
Step 26
Once again Add a Turbosmooth modifier and set the Iterations to 2.
 Click To Enlarge
Step 27
Create a new Box, convert it to Editable Poly and Extrude the four side polygons outward. Then scale the sides down as shown in the picture (without changing the height.)
 Click To Enlarge
Step 28
Now Using Connect with the following settings: Segments 2, Pinch 90. Add new Edge Loops as shown, in order to get nice corners when we add Turbosmooth.
 Click To Enlarge
Step 29
Add Turbosmooth with the Iterations set to 2 and place the Box as shown.
 Click To Enlarge
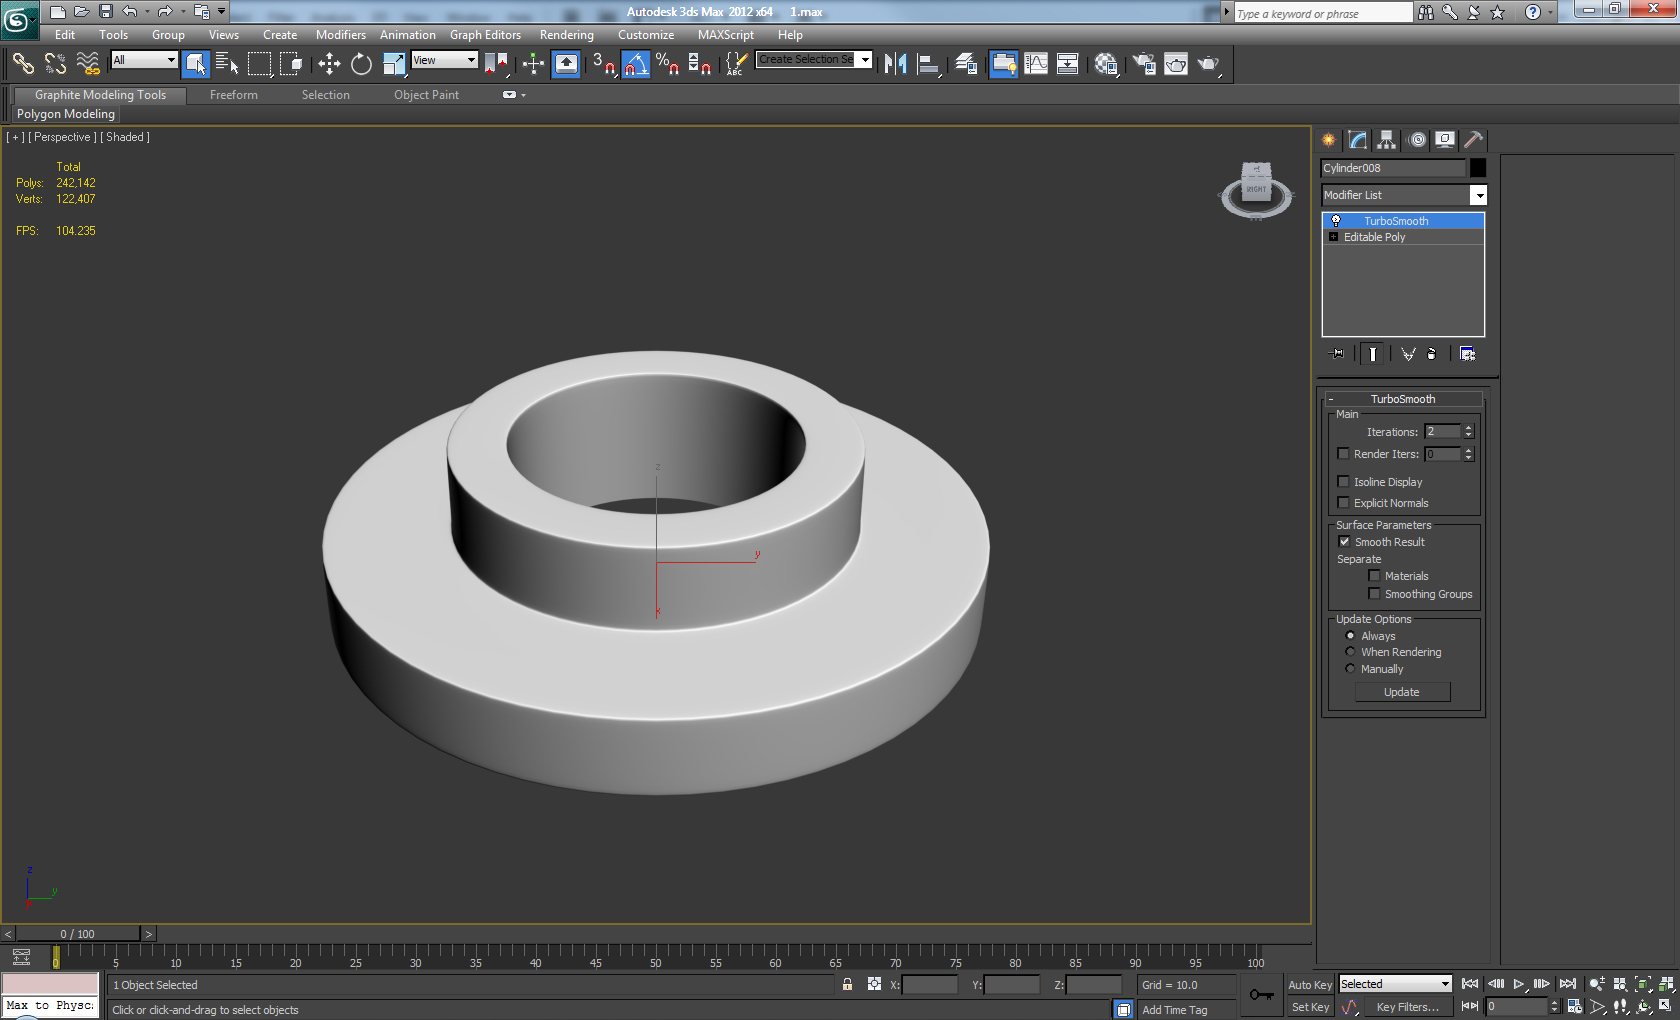
Step 30
Create another new Cylinder with 18 sides. Convert it to Editable Poly, select the top and the bottom polygons, and Inset them.
 Click To Enlarge
Step 31
Once again Inset the top polygon with a lower value, and then one more time with a higher value.
 Click To Enlarge
Step 32
Select and extrude the polygons as shown in the picture below.
 Click To Enlarge
Step 33
Select the bottom polygon, extrude it downward and then delete it (because we are not going to see it in the final model.)
 Click To Enlarge
Step 34
We are going to use Chamfer with a low value and the Connect Edge Segments set to 2, to get a nice shape when we smooth the element.
 Click To Enlarge
Step 35
Add a Turbosmooth with the Iterations set to 2 and create a new Box. Convert the box into Editable Poly and add a new loop as shown.
 Click To Enlarge
Step 36
Scale the front polygon down a bit and add 2 new edge loops on each side - Segments set to 2, Pinch 80.
 Click To Enlarge
Step 37
Add a Turbosmooth modifier - Iterations 2. Then go to the Hierarchy Panel > Adjust Pivot > Affect Pivot Only and copy the X, Y, Z values of the cylinder and paste them onto the box element. Next go to the Tools menu and choose Array...
In the Array dialog, go to Rotate Totals and click on the > icon next to "Rotate", and type 360 into the Axis degrees box. Under the Array Dimensions > Count, type 9 in the 1D field and hit OK. Then select the elements and group them (Group menu > Group.) Finally rotate the elements and place them in the right location as shown.
 Click To Enlarge
Step 38
Make three copies of the wheel and place them as shown. Scale up each one so the result looks like this.
 Click To Enlarge
Step 39
Delete the top polygons of the top wheel. Using Shift+drag and Shift+Scale, inset and extrude the edges to create the shape shown below.
 Click To Enlarge
Step 40
Add a Chamfer to the edges and then add a Turbosmooth modifier- with the Iterations set to 2.
 Click To Enlarge
Step 41
Make a new Sphere with 60 segments, and a diameter that will match the size of the hole in the wheel.
 Click To Enlarge
Step 42
Create a new Cylinder with 18 sides, convert it to Editable Poly and Inset the front and back polygons.
 Click To Enlarge
Step 43
Delete the center polygons on the front and back, as well as most of the other polygons. So we only have the polygons shown in the picture remaining. Also tweak the verticies to match the shape shown.
 Click To Enlarge
Step 44
Add three more edge loops as shown.
 Click To Enlarge
Step 45
Tweak the vertices once again, and then using shift + drag create the polygons in the middle. Then again tweak the vertices so you get a similar shape to what's shown.
 Click To Enlarge
Step 46
Again using Shift + drag add two more segments as shown.
 Click To Enlarge
Step 47
Add one more segment in the center and keep tweaking the vertices until you get this result.
 Click To Enlarge
Step 48
Because of the lack of detail, Delete the entire back side. Select the front polygons and using the Bevel tool create the details shown below on the selected polygons. The outer edges should be tweaked to get a edge like shape on the blade.
 Click To Enlarge
Step 49
Select the border edges and using shift + drag move it to the back in order to create an edge close to the front edge. Repeat the Shift + drag once more and then choose - Make Planar under the Edit Geometry rollout to straighten the back edges.
 Click To Enlarge
Step 50
Add new edge loops using Connect with the Segments set to 2, and the Pinch set to 80 (in the places shown in the image below.)
 Click To Enlarge
Step 51
Then add an addition edge loop as shown below using Connect, Segments set to 1 and Slide set to 80, and -80 for the bottom part.
 Click To Enlarge
Step 52
Finally add a Symmetry modifier and then a Turbosmooth modifier with 2 Iterations.
 Click To Enlarge
Step 53
Place the blade element where it should be located on the head and then go to the Hierarchy panel > Affect Pivot Only and copy the X, Y and Z parameters of the sphere on the top, to the blade element we just created. Make two more copies using the Array tool (or Shift+Rotate) so the result looks like this. And that will complete the model!
 Click To Enlarge
...
You must Sign up as a member of Effecthub to view the content.
A PHP Error was encountered
Severity: Notice
Message: Undefined index: HTTP_ACCEPT_LANGUAGE
Filename: helpers/time_helper.php
Line Number: 22
2656 views 0 comments
You must Sign up as a member of Effecthub to join the conversation.