Modeling, Texturing & Rigging a Realistic Shark in 3D Studio Max - Part 2
In this part of the series, you'll create UVs for the Shark using the UVW Unwrap modifier and apply textures.
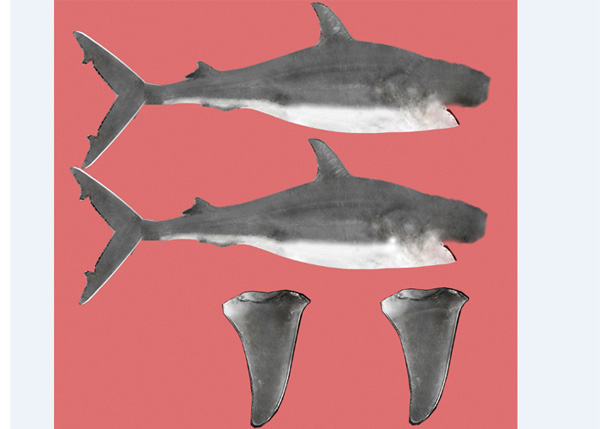
Project Overview:
In this latest series, you’ll learn how to create a believable shark in 3D Studio Max. In part 1, author Soni Kumari will walk you through the entire process of modeling the shark’s body, fins, mouth, eyes and teeth using 3D Studio Max’s standard poly modeling tool-set. Later parts in the series will cover UV Mapping and Texturing, as well as creating a versatile and animation friendly rig for the Shark.
Additional Files:
1. UV Mapping the Body
Step 1
Let’s start 3ds Max and open the "Complete Shark Model.max" file which we saved at the end of the first part of this tutorial.

Step 2
With the shark model selected, Right Click on it and then turn off the NURMS Toggle option in the fly out menu.

Step 3
With the shark polygon mesh selected again, click on the Modify panel option and open the Modifier List, then choose the Unwrap UVW modifier.

Step 4
Now select the applied Unwrap UVW modifier in the modifier stack, and then click on Face selection mode under the Selection group.

Step 5
Now select all the faces that make up one half of the shark polygon mesh (on either the left or right side), and then click on the Open UV Editor button to open the Edit UVWs window.

Step 6
This opens the Edit UVWs window. You will see the Uvs for the selected faces in red. Right now this is not appropriate for applying the texture map, so we will tweak some parameters and options to unwrap it perfectly.

Step 7
But first, to ignore the back face selection, turn on the Ignore Back Facing option.

Step 8
Now with half of the shark mesh selected, go to the Projection group and click on the Planar Map projection button.

Step 9
Open the Edit UVWs window again, and you can now see the new projected UVs in red.

Step 10
Turn off the Planar Map projection button for now; otherwise we won’t be able to edit the UVs in the Edit UVWs window.

Step 11
In the Edit UVWs window, click on the Move tool to move the projected UVs and then move them outside of the checker area, as shown in the image below.

Step 12
With half of the shark mesh still selected, go to the Edit menu in the main menu bar and then click on the Select Invert option (or press Control-I) to invert the selection.

Step 13
With all the faces on the opposite side now selected, turn on the Planar Map projection once again, as we did previously.

Step 14
After applying the Planar projection map, don’t forget to turn it off once you have moved the selected faces out of the checkered area in the Edit UVWs window.

Step 15
With the help of several images, I have prepared this texture image in Photoshop. There are various ways to create such textures, but what I did was use the original blueprint image (side profile) as a background reference layer in Photoshop, and then made the texture using several different skin images.
I have included this texture image in the tutorial folder. However if you want to prepare your own texture, you can do so in Photoshop or another image editing program. Now we just need to adjust the UVs, according to the texture image.
Step 16
Either press the M key (or click on the Material Editor button on the main tool bar), to open the Material Editor window.

Step 17
With the first material slot selected, increase the Specular Level and Glossiness values to 69 and 39 respectively. And then click on Maps stack to expand it.

Step 18
After expanding the Maps stack, click on the Diffuse Color map button to load the texture map.

Step 19
This opens the Material/Map Browser window. Here click on the Bitmap button.

Step 20
Now select the "Shark color.jpg" file which has been supplied with the tutorial (or made in Photoshop), and then click on the Open button.

Step 21
You can now see the texture file in the first material slot.

Step 22
Now we will apply the texture onto the shark mesh. So with the shark polygon mesh selected, click on the Assign Material to Selection button.

Step 23
You can see the texture is now applied to the shark mesh, however it is not looking good right now.

Step 24
Now we have to edit and arrange the UVs of the shark mesh according to the texture image. So open the Edit UVWs window, and click on the texture editing drop down arrow button in the top left corner, as shown in the image below.

Step 25
You will see it is not displaying the applied texture map in the list. So select Reset Texture List to reset (or refresh) the list.

Step 26
And then click on the texture editing drop down arrow again. This time it shows the applied map (Shark color.jpg). So now select the Shark color.jpg texture.

Now you can see the texture file is displaying properly inside the checkered area. Now we have to arrange the UVs to match the texture.

Step 27
With the shark mesh selected in the viewport, expand the the Unwrap UVW modifier and select the Edge selection mode. Then select the first edges loop on the shark's fin, as shown in the image below.

Step 28
With the fin’s edge loop selected, go to the Tools menu inside the UVWs Editor window and select the Break command (or press Control-B), to break the selected edge loop and separate it from the main mesh.

Step 29
Next turn on the Polygon selection mode button in the lower menu bar , and then turn on the Select By Element UV Toggle button. Now click on the broken UVs of the fin.

Step 30
In the same way, also select the first edge loop of the other fin, as shown below.

Step 31
With the fin’s edge loop selected, again go to the Tools menu inside the UVWs Editor window and select the Break command (or press Control-B), to break the selected edge loop and separate it from the main mesh.

Step 32
In this way, we have now broken off both fin shells.

Step 33
Now we will make a shell around the mouth, using the outer edge loop. So back in Edge selection mode, select the mouth’s border edges as shown in the image below.

Step 34
With the edge loop outlining the mouth selected, go to the Tools menu inside the UVWs Editor window and select the Break command (or press Control-B), to break the selected edge loop and separate it from the main mesh.

Step 35
Now with the shell selected for one side of the shark's body, go the Tools menu inside the UVWs Editor window, and select the Flip Horizontal command.

Step 36
We have now flipped the UVs for the shark’s body, and will now try to match them up with the texture image.

Step 37
Select one of the UVs shells and then with the help of the Move tool, drag the UV shell onto the corresponding image as shown below.

Step 38
Repeat the same breaking process with the opposite side’s UV shell, as stated in the Step 34.

Step 39
With the upper UV shell selected, go to the Tools menu inside the UVW Editor window and click on Relax.

Step 40
This opens the Relax Tool option box. Here select the Relax By Edge Angles option from the drop-down menu, and then click on the Start Relax button. You'll see the selected UVs start to relax.

Step 41
Here you'll notice one problem. The UVs shell gets flipped again. So with the UVs shell selected, go to the Tools menu and select Flip Vertical, to flip the shell vertically once again.

Step 42
After flipping the UV shell, we need to arrange it according to the image using the Rotate and Scale tools.

Step 43
Scale and Rotate the UVs as needed to match them up with the image, but we'll still need to adjust them more to get a proper fit.

Step 44
The best way to do this is to select each and every Vertex and match them with the image properly.

In this way, arrange all the outline vertices according to the image, as shown below.

Step 45
We are now finished with one side of the body UVs, as shown in the image.

Step 46
Next, we'll arrange the other side’s UVs according to the texture, just as we did previously.

Step 47
So with the UV Shell selected, go to the Tools menu (inside the UVW Editor window) and then click on Relax. In the Relax Tool dialog box, again select Relax By Edge Angles and then click on the Start Relax button. You will see the selected UVs being relaxed.

Step 48
Also pick each and every vertex of the UV shell and try to match them up with the image properly.

Step 49
In this way, we have arranged both side UVs properly according to the texture map.

Step 50
After positioning both body UV shells, you can see the result in the viewport.

2. UV Mapping and Positioning the Fins
Step 1
Now we will arrange the rest of the broken shells for the side fins. So pick the side fin shells one by one, and then move them onto the corresponding texture image to match it up correctly.

Step 2
In this way, we have arranged and placed both of the side fin shells according to the image.

Step 3
Now we will arrange the rest of the small fin shells. So select one of the small fins and place it near its corresponding UVs mesh.

Step 4
Now go to the Tool menu (inside the UVW Editor window) and this time select Target Weld (or press Control-T).

With the Target Weld tool selected, select a vertex from the small fin shell and then drag it over its corresponding vertex to weld them together.

Step 5
In this way, weld all the corresponding vertices together.

3. UV Mapping and Positioning the Mouth
Step 1
We also need to place the inner mouth broken UV shells in the pink area of the image.

Step 2
Now we need to apply a projection map to the inner mouth UV shells before we can relax them. So select the side mouth shells one by one, and then apply a Planer Map projection to them.

Step 3
Place both inner mouth UV shells outside the texture area, so we could relax and unfold them properly.

Step 4
Select any of the side inner mouth UV shells and go to the Tools menu (inside the UVW Editor window), and then click on the Relax command. In the Relax Tool dialog box, select Relax By Face Angles and keep the values of the Iterations at 10, the Amount at 1.0 and set the Stretch to 0.137. Then click on the Start Relax button and then click on the Apply button. You will see the selected UVs are relaxed now.

Step 5
In this way, we have unfolded and relaxed both sides’ inner mouth UV shells properly.

Step 6
Now we will correct the mouth area texture. So while in Edge selection mode (inside the Unwrap UVW modifier), select Loop: XY Edges mode and then select the mouth outline edge loop.

Step 7
With the mouth outline edge loop selected, go to the Tools menu (back inside the UVW Editor window) and select the Break tool.

After braking the mouth UV shell, it looks like this.

Step 8
In this way, we are done with the shark UVs. Next we'll paint in Photoshop wherever it's required.

4. Rendering a UV Template for Photoshop
Step 1
It's quite necessary to do some work in Photoshop, as we need to paint and smudge some areas to make the texture seamless.

Step 2
Therefore we need to create a UV template, so we can work in Photoshop. So again go to the Tools menu (inside the UVW Editor window) and select the Render UVW Template option.

Step 3
This opens the Render UVWs window. Here set the Width and Height values to 2048 and then click on the Render UV Template button.

Step 4
We now get a rendered UV template inside the Render Map window. Here click on the Save Texture Image button and save it in .jpg format.

Step 5
In this way, we have a UV template image we can use for smudging and painting in Photoshop.

Step 6
We need to paint and patch the texture around the lip area and also remove any seams where required. This may take a long time to rectify and I assume you are all well versed in Photoshop, so I will not cover the process in this tutorial. After making the required corrections, you'll need to save the image, and then update the texture in the Material Editor back in 3ds Max.


5. Creating Materials
Step 1
Next, back in 3ds Max we'll apply a material to the eyes. So open the Material Editor (M) and select an empty slot. Change the Diffuse color to a dark black, and then change its Specular value to 90, and its Glossiness to 55. Then apply this material to both eyes.


Step 2
Finally, go back to the main Shark material, and copy the texture map and paste it into the Bump channel with the Bump Value set to 3 or 4. This will add a little bit of bump to the skin texture.

Conclusion
We have now completed the texturing of the shark. For now, save this file as "Complete Textured Shark.max". In the next part of tutorial, you'll learn how to rig and skin the shark. This will certainly be fun!

...
You must Sign up as a member of Effecthub to view the content.
A PHP Error was encountered
Severity: Notice
Message: Undefined index: HTTP_ACCEPT_LANGUAGE
Filename: helpers/time_helper.php
Line Number: 22
6107 views 8 comments
You must Sign up as a member of Effecthub to join the conversation.